Create your own promotional items using printable products and free Avery tools
Swag bags are great promotional tools because everyone loves free stuff. Whether you’re in charge of complimentary swag for clients or putting together giveaways for events and social media contests, we’ve got some great swag bag ideas for you. In this article, you’ll find not only, 15 great swag bag ideas, but also helpful tips and free Avery tools to help you get the job done.
More articles you might like
- Business Gifts – What to Know Before You Buy
- Turn Your Products Into Client Gifts
- 7 DIY Employee Gift Ideas with Free Printables
How many items should be in a swag bag?
There is no hard and fast rule as to how many items should be included in a swag bag, however, we recommend aiming for at least five items. Although the size, weight, and value of the items can easily shift that number.
For example, a button, postcard, coupon, sticker, and $5 gift card might not create as much buzz with your audience as an expensive travel mug and a raffle ticket. A large potted plant might be within your budget and excite your audience, but it would be awful to carry around at a large event.
Most importantly, consider your budget and audience. Then factor in current trends and the impact, size, and weight of items when brainstorming swag bag ideas.
Free tools for customizing swag
While there are many options out there for creating custom promotional items, often they are limited. High minimum order quantities, graphic designers, and expensive “file processing” fees can eat up a lot of your budget.
But when you sign up for a free Avery account you have access to free tools for designing your own swag bag ideas. Avery Design and Print Online (ADPO) is free online software for designing labels, cards, and tags.
With ADPO you can design from scratch on blank Avery templates, or modify predesigned Avery templates with custom text, graphics, logos and so much more. Find templates for any Avery product by entering the product number in the Avery template finder.
Whether you print your creations yourself or have us print for you, you’re not limited by huge minimums to order. Our professional WePrint® service allows you to order as few as two sheets of labels, cards, and tags or hundreds with zero file-processing fees.
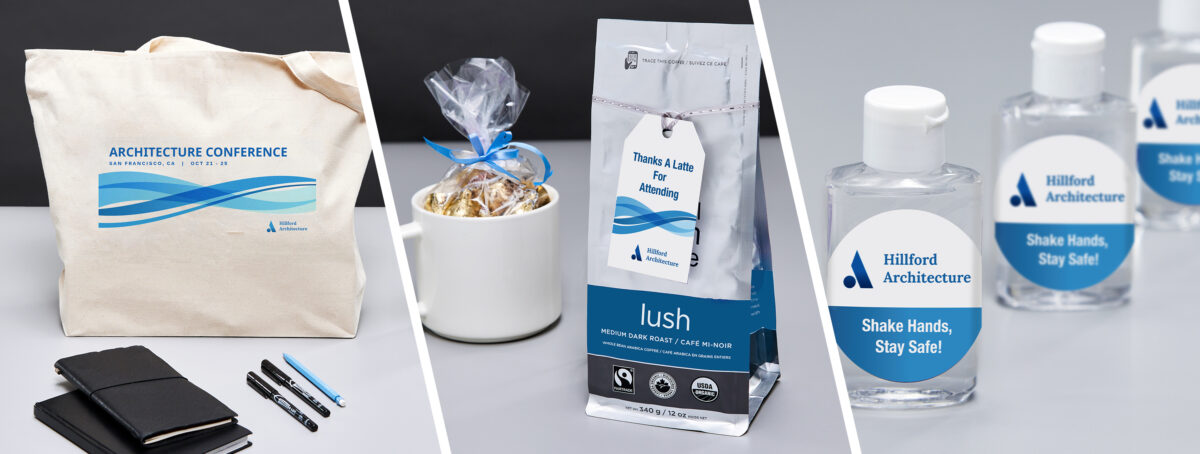
1) Custom tote swag bag idea
While free stuff is awesome, you don’t want clients or potential customers struggling to carry items. Other containers certainly work for swag bags, however, a classic tote remains the MVP.
Design your own tote using free tools in ADPO, browse predesigned templates for business or upload your own complete artwork.
Order printable light fabric transfer (3271).
2) Your products are the best swag
Turning your own products into promotional items is a great way to get people to try them. Use a QR code label to get reviews, conversions, and social shares.
First, click the More button located in the left navigation bar in ADPO. Then choose the QR and Barcodes tool. Upload your own logo to finish.
Order 1.5″ printable round labels by the package (8293), by the sheet, or custom printed round labels
3) Raffle tickets for valuable prizes
A raffle is a great way to create buzz at promotional events, make use of high-value donated items, and collect emails.
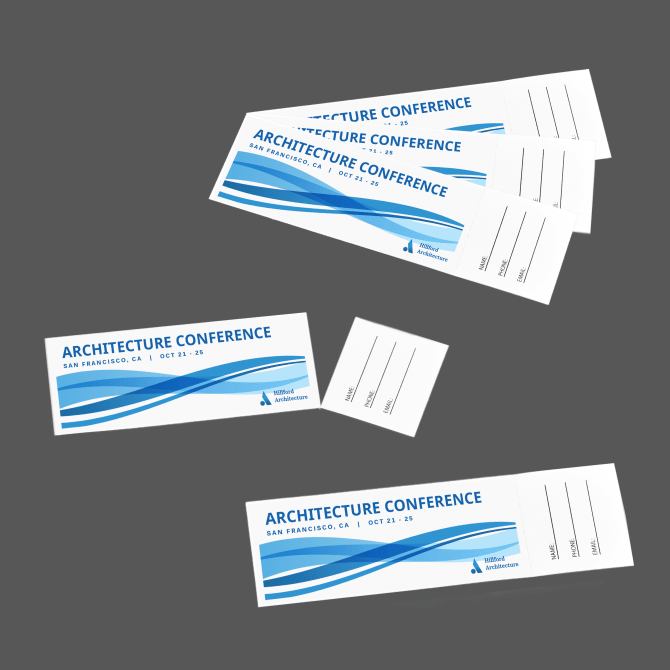
Be sure that you follow best practices for collecting emails, such as notifying entrants or making it an entry option.
Order printable tickets with tear-away stubs (16154) or custom printed tickets.
4) Customized tee swag bag idea
Like tote bags, free t-shirts are a time-honored swag bag idea. Create simple logo tees for client swag and online giveaways or customize your design for a specific event.
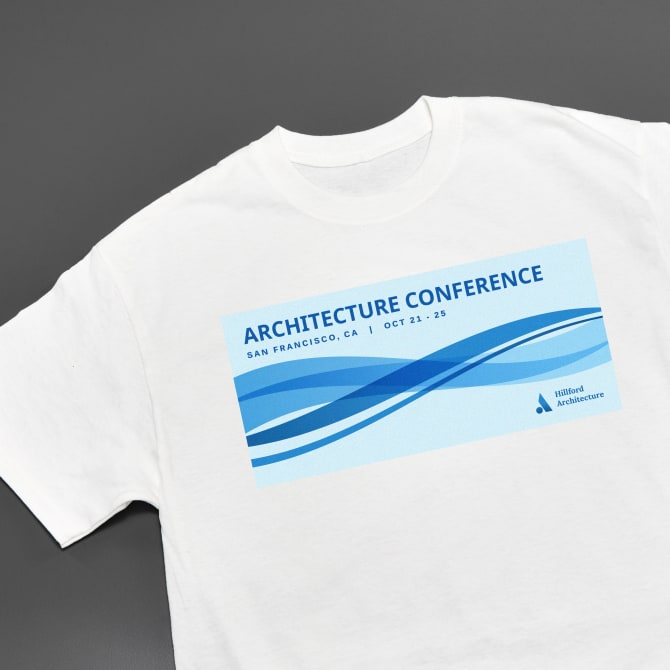
Check out our YouTube video on working with images in ADPO and subscribe to our channel for more helpful tips.
Order printable stretchable fabric transfers (3302)
5) Custom die-cut vinyl stickers
With our WePrint service, if you already have a logo, you can create custom vinyl logo stickers in just minutes.
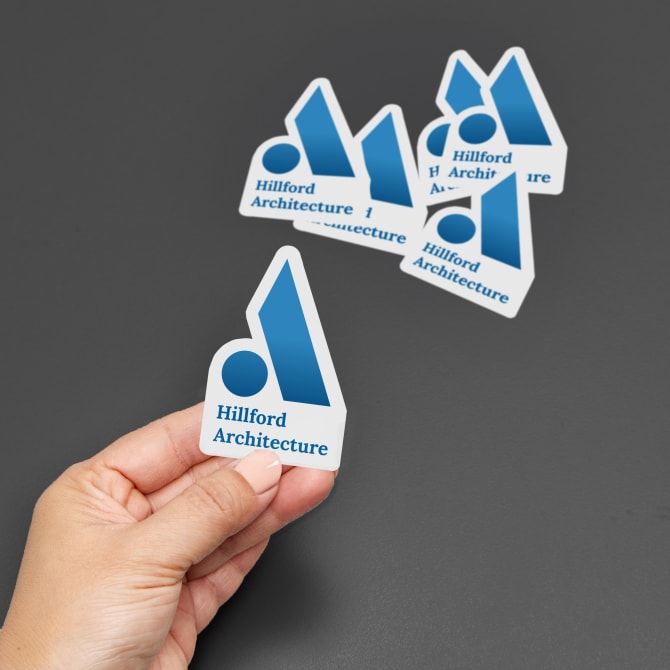
First, upload your logo or design, next, enter your sticker size. Then pick matte or glossy vinyl. Finally, choose your quantity, add to your cart and you’re done!
Don’t have a logo yet? Learn how to make a logo for your business.
6) Items to use with your products
Try building your swag bags around your products. Start with samples of your products, then add items relating to them. Pull it all together with cohesive branded packaging. This idea also doubles as an excellent way to turn your products into client gifts.
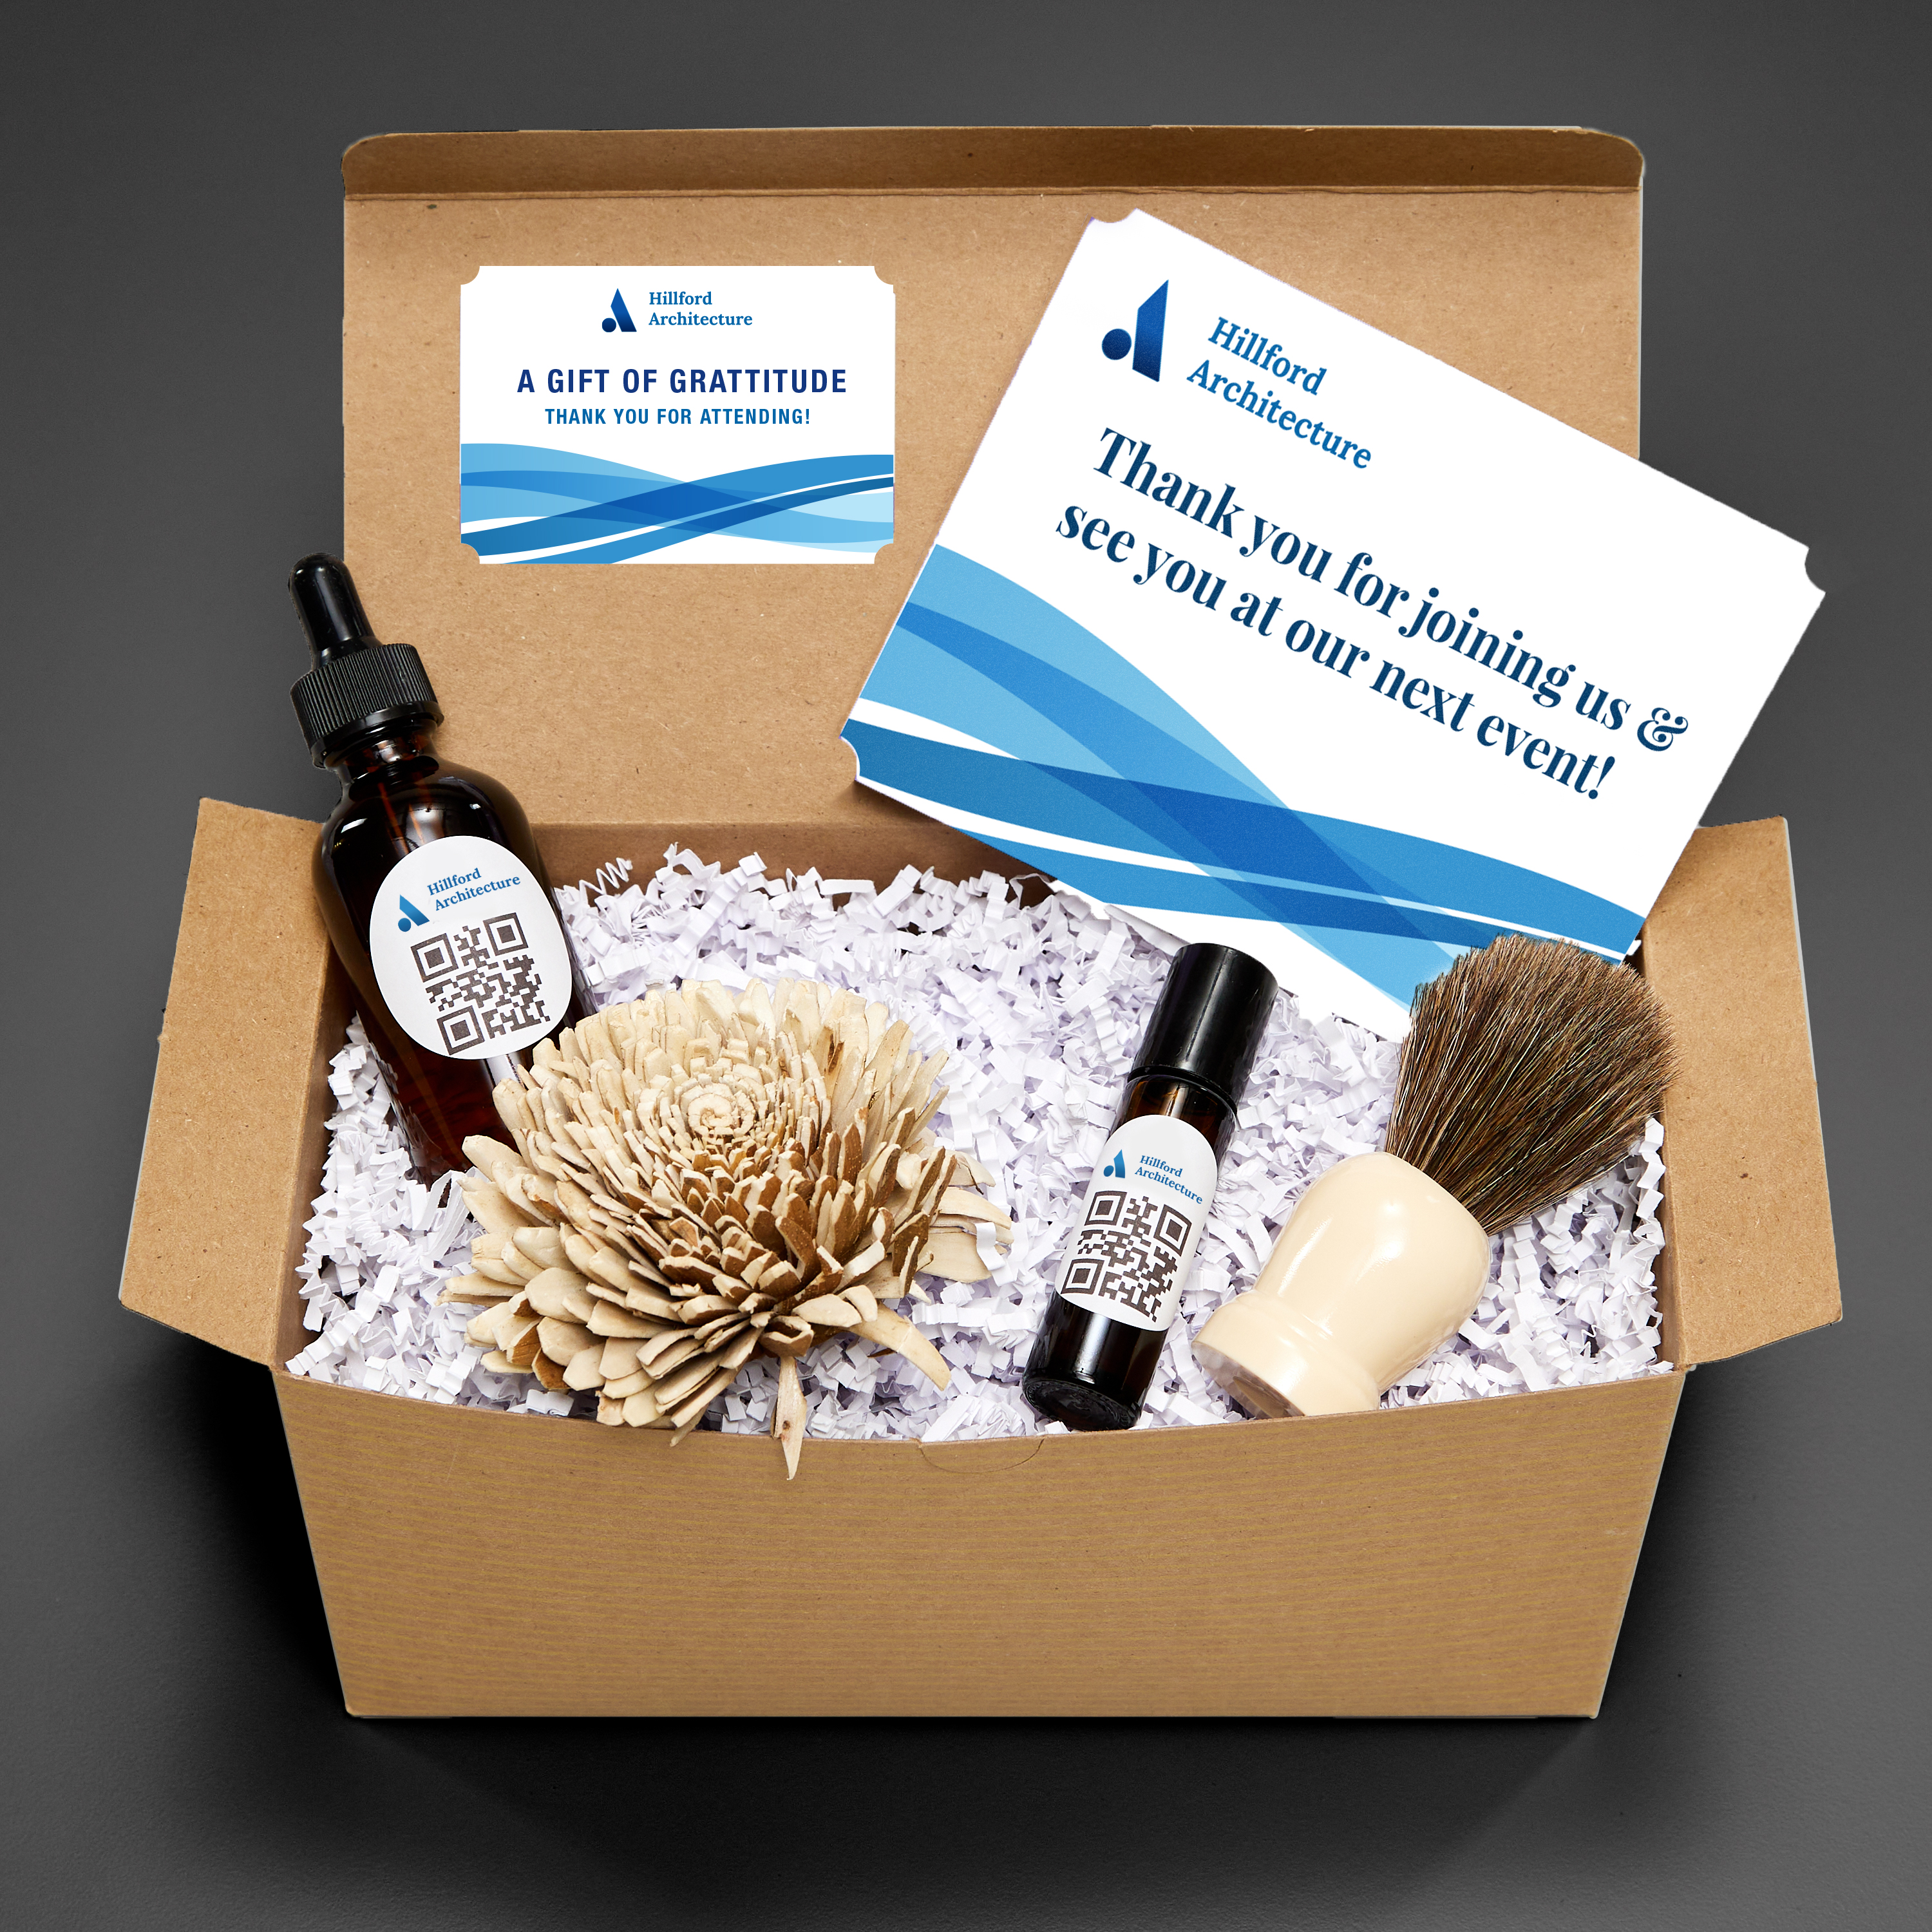
Order this design on custom-printed postcards with scalloped corners.
Or, apply your customized design to other Avery products. First, finish customizing your design, then save it to your free Avery account. Once it’s saved you can apply it to any Avery product, including DIY scalloped cards (5626)
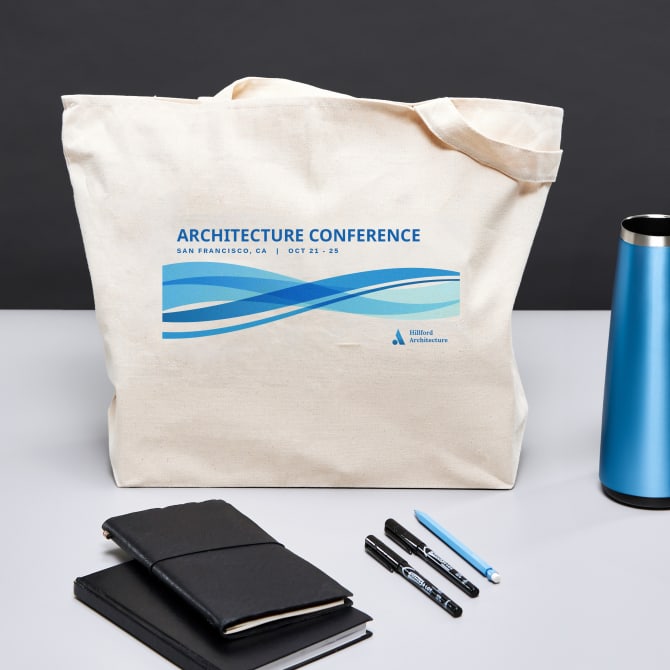
7) Coffee, mugs and accessories
Coffee is a perennial favorite for corporate gifting. Group items together and add your own branding to include in any swag bag.
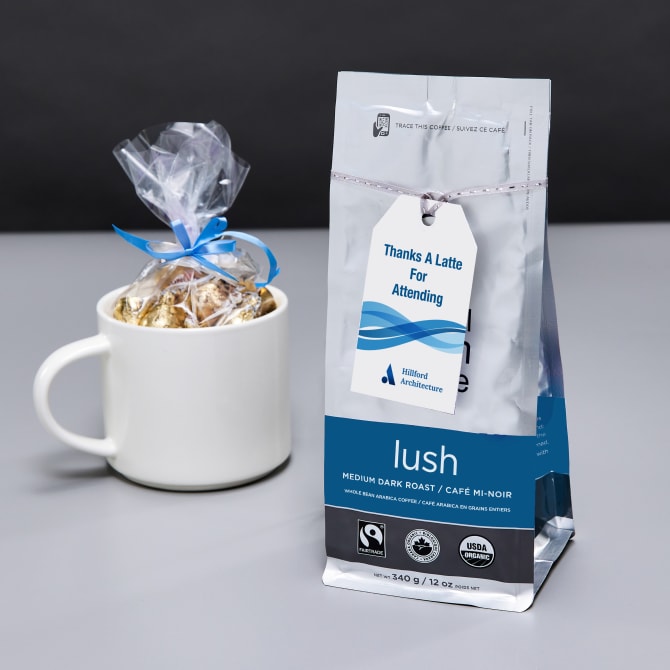
Use the navigation bar on the left side in ADPO to edit, add, or change the color of text and shapes in both blank and predesigned Avery templates.
Order printable tags (22802) or custom printed tags.
8) Travel necessities swag bag
Universal phone chargers, gum, wet wipes, hand sanitizer, and screen cleaner are just a few examples of items that are always appreciated when traveling.
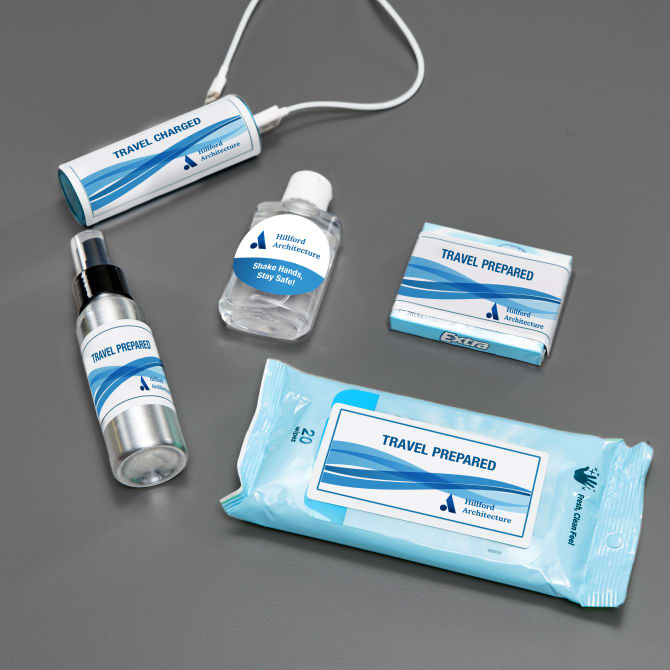
Build an entire swag bag idea around the concept of a travel kit, or simply add branded travel items to what you already have.
Order printable rectangle labels (18163), blank rectangle labels by the sheet, or custom printed rectangle labels.
9) Candles, aromatherapy and self-care
Candles bundled with other self-care items are another evergreen swag bag idea. In particular when you want to communicate a calm “stress-free” relationship with your potential clients and customers.
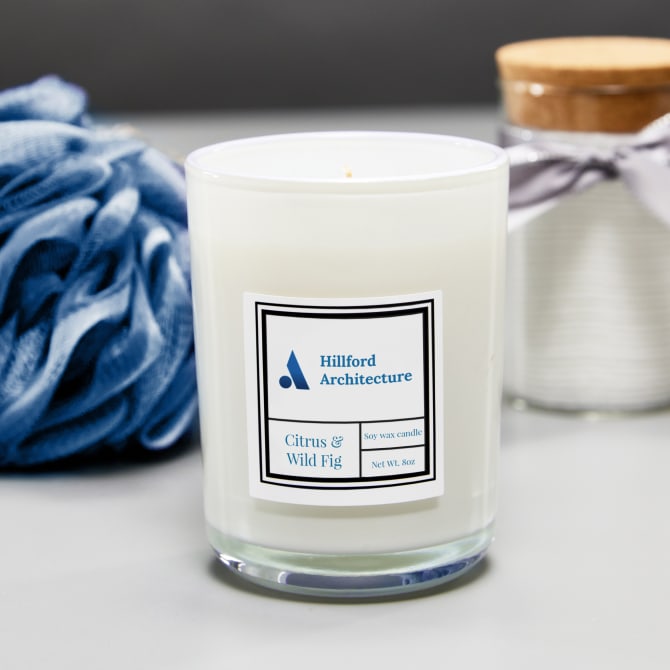
Choose waterproof film labels, not paper so that your labels stay looking fresh even if they get splashed with water or oils.
Order printable square waterproof labels (64503) or square labels by the sheet or custom printed square labels.
10) Gift cards and discounts
Gift cards are always a popular choice for giveaways. Whether you include one for your own business or something that generally appeals to your audience is up to you.
Similar to using your own products as swag, including a gift card or coupon for your business helps get your products into more hands.
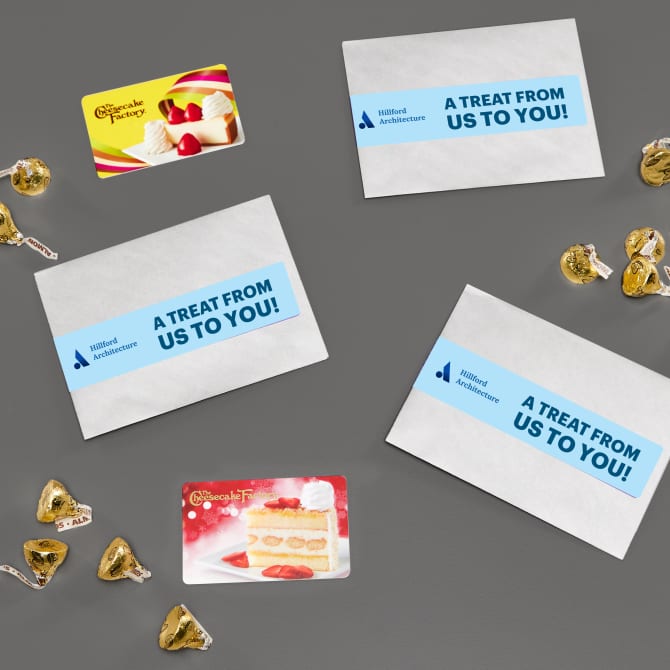
For small items like gift cards and coupons, it’s really all about presentation. Consider a small paper gift bag or card envelope with branded labels.
Order printable wraparound labels (22845), blank wraparound labels by the sheet, or custom printed wraparound labels
11) Notebooks and writing supplies
The journaling trend continues to grow. In particular, bullet journals and personal planners for increasing productivity.
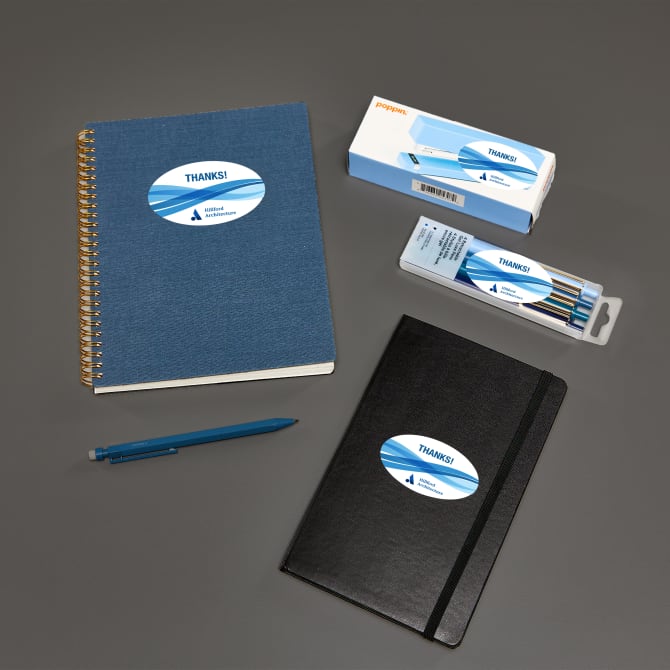
Additionally, notebooks often come in handy at big events for jotting down notes during presentations.
Order printable oval labels (22564), oval labels by the sheet, or custom printed oval labels.
12) Pencil pouches and makeup bags
Useful items never go out of style. Moreover, they serve as frequent reminders of your brand or event.
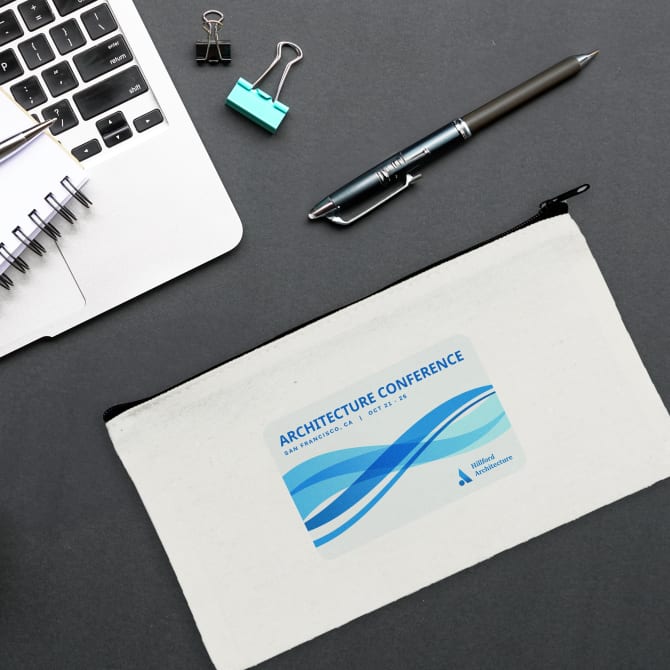
Try adding a color background to your designs in ADPO using the Background tool.
Order printable small rectangle fabric transfers for light fabric (2234) or dark fabric (2230).
13) Keychain wallets/coin purse
Keychain wallets/coin purses are likewise an evergreen useful item. They’re particularly useful during business travel.
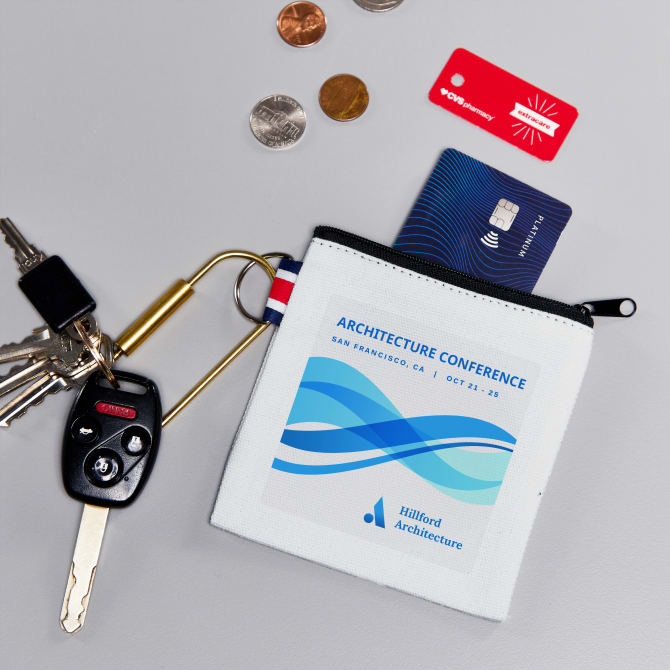
Use the Shape tool in ADPO to add a background color to only part of your design.
Order 3” square printable fabric transfers for light fabric (2235) or dark fabric (2231).
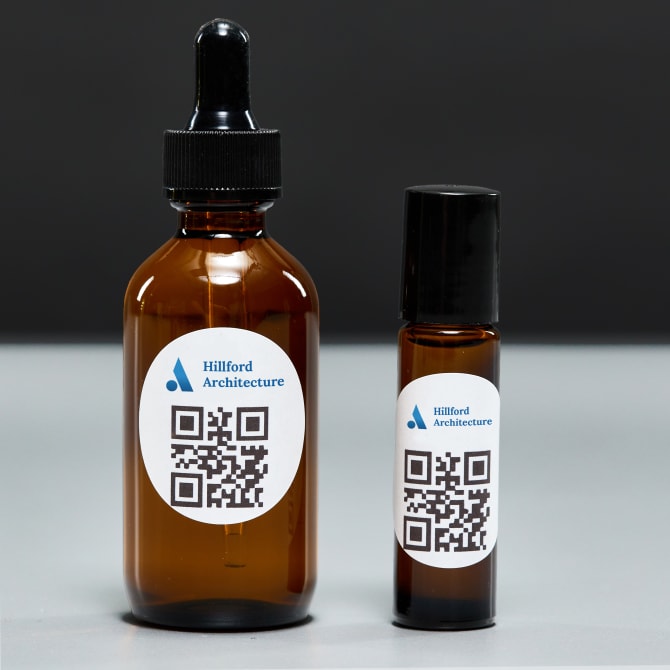
14) Swag bag travel hand sanitizer
Travel-sized hand sanitizers are an absolute must-have for reducing germs on your hands and therefore have never been more popular as promo items.
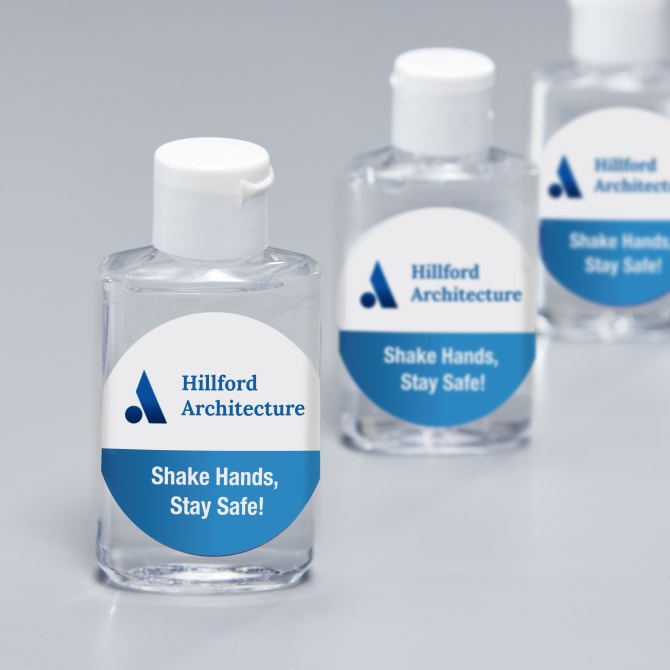
Beyond swag bags, travel sanitizers are also handy to have stocked at the office for visitors or anywhere you sell without a storefront. For example, pop-up shops and trade shows.
Order printable 2” round labels (22807), round labels by the sheet, or custom printed round labels.
15) Eco-friendly swag bag items
Eco-friendly products are perhaps the fastest growing trend when it comes to swag bag ideas. Especially for audiences that include younger people.
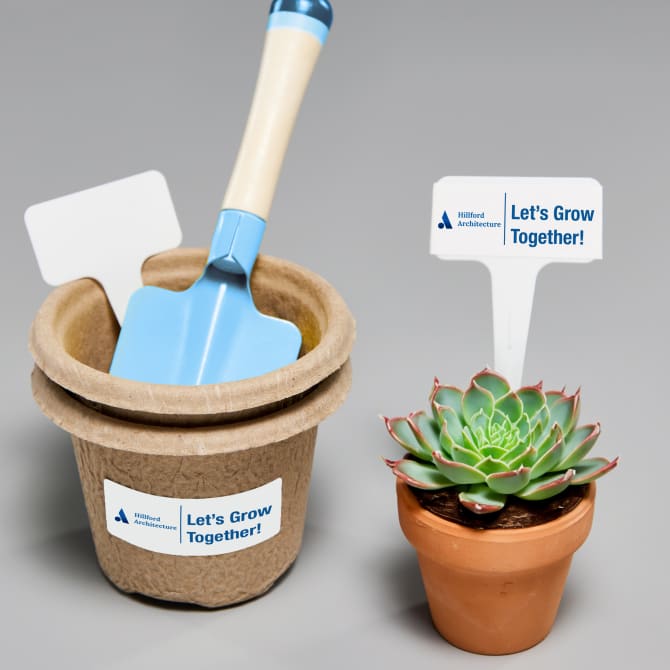
Think eco-friendly means your branding options are limited? Nope. We offer a range of eco-friendly labels and stickers!
Order printable eco-friendly labels (48160), eco-friendly labels by the sheet, or custom-printed eco-friendly labels.
Create DIY swag bag ideas with Avery products and free tools
In summary, Avery printable products make it possible for anyone to create branded labels, cards, and tags for a variety of swag bag ideas. You can also print on our fabric transfers. Our free Avery Design and Print Online software and a free Avery account are all you need to get started.
What was the coolest thing you ever received in a swag bag? Shout it out in the comments!


Love all the ideas for swag bags!