

How to Design Labels Using Illustrator and Avery
A step-by-step guide to help you design your perfect labels
Other articles you might like:
Creating professional-looking labels is an essential skill for businesses and individuals. Whether you’re packaging products, organizing files, or sending out mass mailers, crafting visually appealing labels can enhance your brand’s identity and streamline your operations. In this step-by-step guide, we explain how to create amazing labels using Adobe Illustrator® and Avery labels.
Why Choose Illustrator and Avery Labels?
Adobe Illustrator stands out as a premier graphic design software, known for its versatility and robust features. Its intuitive interface and extensive toolset make it ideal for creating intricate designs with precision and ease. Paired with Avery labels, which are known for their high quality, you have a winning combination for producing professional-grade labels.
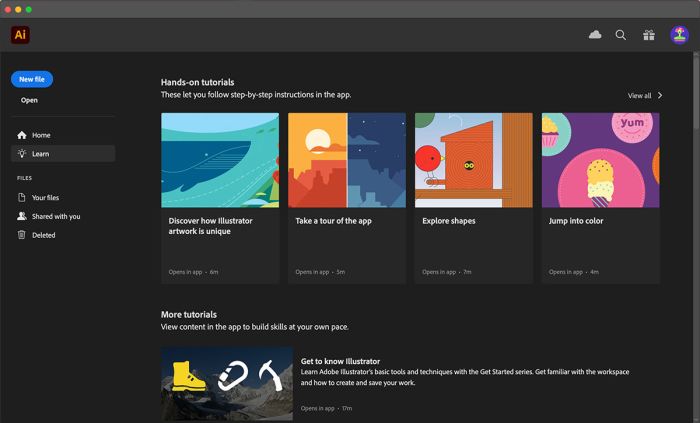
Understanding Illustrator basics
Adobe Illustrator is a versatile vector graphics editor that’s become an indispensable tool for designers, artists, and creatives across various industries. Launched by Adobe in 1987, the software is known for its precision, scalability, and extensive set of features. Because of its intuitive interface and powerful capabilities, Illustrator allows users to create everything from logos and icons to illustrations and complex artwork. Illustrator’s vector-based approach enables seamless scaling without loss of quality, making it ideal for both print and web design projects.
Interface
Illustrator’s interface is designed with user-friendliness and efficiency in mind. It features a clean, intuitive layout, with essential tools organized in convenient panels and menus. The workspace allows you to customize the environment to your specific preferences.
Key features that are included are the Tools panel, where you can access drawing and editing tools; the Control panel, which provides quick access to options and settings relevant to the selected object or tool; and the Properties panel, that offers detailed control over object attributes. Even better, the interface supports seamless integration with other Adobe Creative Cloud applications, providing a smooth workflow for designers and artists.
Tools and their functions
Illustrator offers an array of tools and functions to meet the diverse needs of designers and artists. Its drawing tools such as the Pen tool, enable precise creation of shapes and paths, and the Pencil tool, allows freehand drawing. Users can easily manipulate objects using tools like the Selection and Direct Selection tools. There’s a Shape tool as well that offers quick access to standard geometric shapes.
The software also has a typography feature that lets users finesse text with options like kerning, tracking, and text wrapping. Advanced functions such as Pathfinder and Shape Builder let users to combine, intersect, and subtract shapes to create complex compositions. Illustrator also provides a wide range of effects, filters, and brushes to add depth and dimension to artwork.
Planning your label design
Identify your labels’ purpose and audience
To create an effective, impactful label you need to identify the purpose and audience. The purpose is the guiding principle that dictates the content, tone, and visual elements of your label. Whether it’s to inform, persuade, or simply to enhance your brand identity, understanding the purpose ensures that the label aligns with your intended message and goals.
Equally important is understanding your audience – their demographics, preferences, and expectations. When you know who will interact with the product and label, you can tailor your artwork to resonate with that target audience. Whether it’s attracting consumers on a crowded shelf or providing essential information for regulatory compliance, a well-planned label design can significantly enhance your product’s visibility, appeal, and usability.
Research design inspirations and trends
To create a compelling product label that resonates with your target audience you must research current design trends and inspiration. Check out sources such as industry publications, competitor analysis, and cultural influences to find new, innovative ideas. Try researching historical design elements as well, or draw inspiration from nature, art, or technology. These can provide a unique perspective and give your labels depth and authenticity.
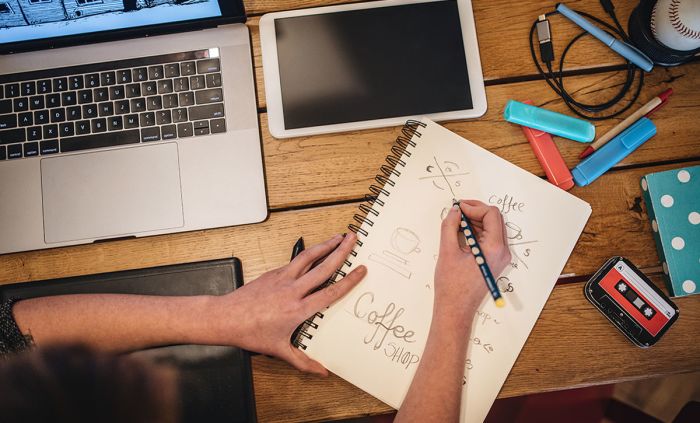
Sketch out ideas
Sketching out design ideas for a product label is an important phase in the creative process. It gives you the freedom to explore different concepts and visual arrangements. You can explore various layouts, typography choices, iconography, and graphical elements, seeing how they all interact with each other.
This approach will encourage not only creativity but problem-solving, as you can refine your ideas based on feedback from others and personal intuition. Also, sketching allows for spontaneous inspiration that you might not have through digital means alone. Overall, it’s an important step in the design journey, providing a solid framework from which to develop polished and impactful product labels.
Setting up your Illustrator workspace
Create a new document

When preparing your Illustrator workspace for designing labels, creating a new document will lay the foundation. Begin by accessing the “File” menu at the top of the interface, then select “New” to open the New Document dialog box. Within this interface, key parameters like label dimensions, orientation (portrait or landscape), units of measurement, and color mode should be carefully configured, aligning with the specifications of your label project. Consider the intended printing method and substrate when determining color mode—CMYK for print and RGB for digital formats.
Depending on your label requirements, you may want to create multiple artboards for various label designs or iterations within a single document. This will ensure efficiency and organization throughout your design process. Once satisfied with the settings, click “Create” to generate your new document, which will provide you with a canvas ready to be adorned with your label designs.
Set up artboards for label size
Setting up artboards in Illustrator requires attention to detail to ensure the seamless creation of label designs tailored to specific dimensions. Begin by accessing the “Artboard” tool or navigating to the “Artboard” menu, then select “New Artboard” to generate a new artboard within the document. Specify the exact dimensions of the label size you’re working with. For multiple labels or variations, you can duplicate the initial artboard and adjust as needed.
Arrange the artboards within your workspace, leaving ample space between them for design clarity and organization. This setup streamlines the design process, allowing for focused creation and easy access to different label iterations within a single document.
Adjust preferences for efficient workflow
When creating labels in Illustrator you should customize preferences to suit your specific needs and streamline the design process. Start by accessing the “Preferences” menu from the Illustrator application menu on the top navigation bar. Within the Preferences dialog box, explore various settings related to units, grids, guides, and rulers, adjusting them to match your preferred workflow and design requirements. For label creation, consider setting units to match the dimensions commonly used in label design (such as inches or millimeters) for precision. Enable snapping options like Smart Guides and Snap to Grid to ensure accurate alignment and positioning of design elements. You can also customize keyboard shortcuts to expedite repetitive tasks and navigate through tools seamlessly.
Designing your label
Import assets like logos and images
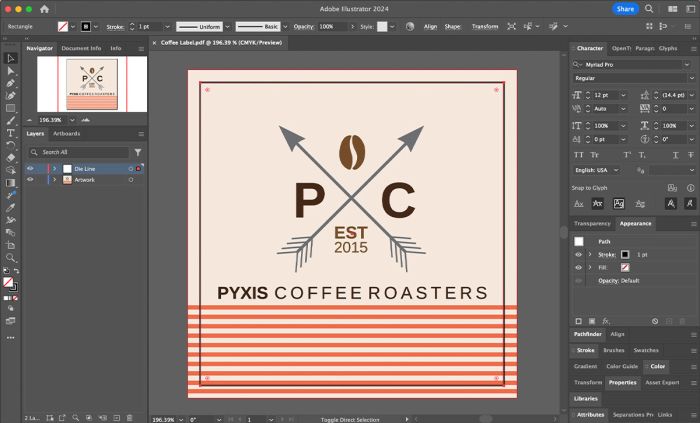
When you’re designing a label in Illustrator, you will likely need to import assets like logos and images to create a visually appealing and professional design. Begin by selecting “File” from the top menu and then choosing “Place” to import your assets into the document. This allows you to easily add high-quality logos and images without compromising resolution or quality.
Once you’ve imported your items, use the selection tool to resize, position, and rotate the assets as needed to fit your label layout. You can use layers to organize your design elements, keeping logos and images separate from other elements for easy management and editing. Remember to embed linked assets to ensure portability and consistency across different platforms or devices.
Use text tools for label information
When designing a label in Illustrator, using text tools is essential to communicate key details about your product. Use the text tool to add essential information such as product name, ingredients, instructions, and branding messages. You can adjust text attributes like font style, size, color, and alignment to ensure readability and aesthetic harmony with your overall design. Employ text wrapping and paragraph styles to maintain consistent formatting and flow of information, especially when dealing with long sections of text. Also, consider incorporating decorative typography or custom lettering to enhance the visual appeal of your label.
Use shapes and drawing tools
When you use shapes and drawing tools for design elements you can create visually compelling and cohesive labels. Try using basic shapes like rectangles, circles, and polygons as building blocks for your label layout. You can customize your shapes by adjusting attributes such as fill color, stroke weight, and opacity to achieve the look you want. The Pen tool allows you to create custom shapes or intricate illustrations, while drawing tools like the Brush let you create hand-drawn accents or decorative flourishes to add personality and charm into your label design.
Incorporate color schemes and typography
To create visually engaging designs, try integrating color schemes and typography. To do this, begin by selecting a color scheme that reflects your brand’s identity and resonates with your intended audience. Use the color swatches panel to maintain consistency and harmony. Incorporate color to differentiate sections of the label, highlight key information, and evoke emotions or associations.
Carefully choose typography that complements the overall aesthetic and reinforces your brand messaging. Try experimenting with font styles, weights, and sizes to create hierarchy and visual interest within the label layout. Ensure readability by adjusting spacing, leading, and kerning as needed
Add effects and finishing touches
Add special effects and finishing touches as the final steps toward elevating the visual appeal of your label design. Illustrator lets you add effects such as drop shadows, glows, and gradients to add depth and dimension to key elements of your label. Try experimenting with blending modes and opacity settings to achieve subtle or dramatic effects that enhance your label’s overall aesthetic.
You can also add textures or patterns to incorporate tactile qualities. Additionally, think about including things such as borders or decorative elements to frame the label and draw attention to important information. Finally, ensure a professional finish by reviewing the design for consistency, alignment, and accuracy before exporting the final artwork for printing.
Printing your labels with Avery
Exporting your design from Illustrator
Exporting your label design from Illustrator to Avery is a straightforward process that ensures seamless printing and production. First, finalize your design in Illustrator and ensure that all elements are properly positioned and formatted according to your requirements. Once you’re satisfied, navigate to the “File” menu and select “Save As.” Choose a file format compatible with Avery software, such as PDF or PNG, to maintain high-quality resolution and compatibility.
Second, open the Avery design software or website and import the saved file. Follow the prompts to select the appropriate label template and adjust settings as needed to ensure proper alignment and sizing.
Finally, review the design preview to confirm that everything appears as intended before proceeding to order professionally printed labels or print them yourself. By following these steps, you can effortlessly transfer your label design from Illustrator to Avery, streamlining the printing process and ensuring professional results.
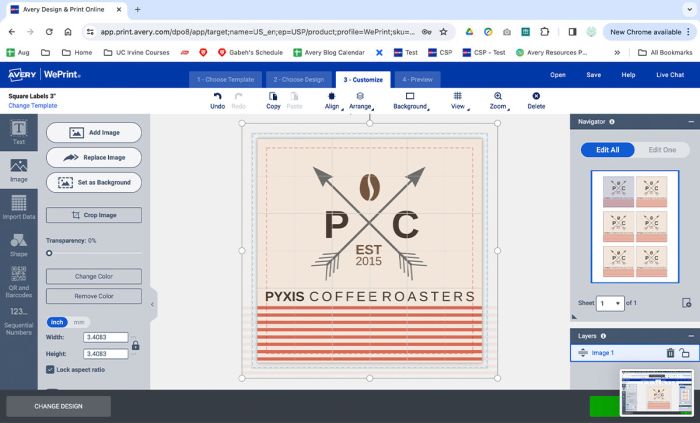
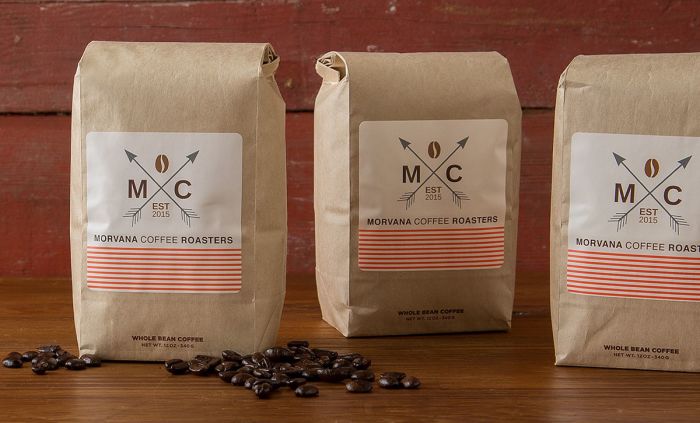
Choose an Avery template and upload your artwork
Select the appropriate template based on the label size and type you’re using. Since you are likely importing your artwork, you will choose the blank template that corresponds to your label shape and size. Once you’ve chosen the template, upload your art file into the Avery design software. Follow the prompts to finalize your design, adjusting settings as needed, and then proceed to order or print your labels with ease. This seamless process ensures that your label design is accurately translated onto Avery labels, saving you time and effort in the printing process.
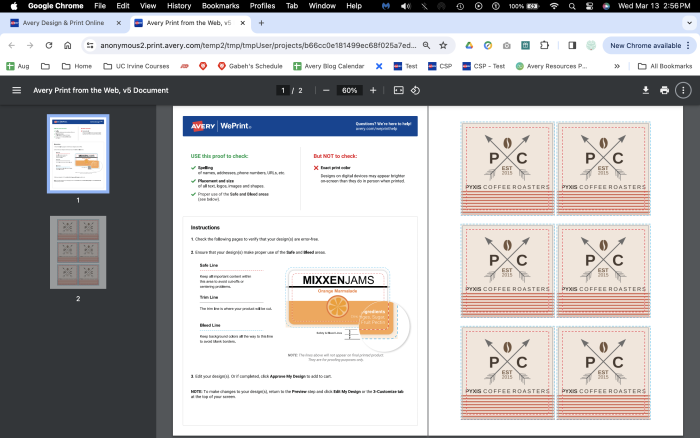
Adjust your layout to ensure proper alignment
The printable area of a label is split into three sections:
Safety area: The section that is guaranteed to print on the label. Keep all of your important content such as text and business logos within this area.
Trim area: The physical border of the label. This border will give you a good approximation of where your design will be cut off.
Bleed or print-to-the-edge area: The extra design space outside the trim line that full-color backgrounds, images, and other content fill in order to have a print-to-the-edge or full-bleed design. Filling in this area ensures that there will not be any blank margins around your final label.
The Avery Design & Print software will automatically optimize your design. It will display the safety area, warn you when your design is incompatible, and offer you a variety of editing tools. The software also allows you to choose from thousands of designs that are already optimized for the best printing experience if you want to add your artwork to an existing predesigned template.
Order or print your labels
After you’ve uploaded your artwork click on “Preview & Print” at top of the screen. This will give you a full page view of the project. Now you can choose to order your professionally printed labels or print them yourself.
Preview your proof in the PDF and save your project to your online Avery account or your computer. If you are printing yourself, the Printing Tips page will appear. Make sure to follow the instructions carefully for DIY printing.
Tips for success
Double-check label dimensions and bleed areas
As stated above, make sure to check the bleed, safety, and trim areas of your label so everything you want on your label gets printed. Many factors (art file, label size & material properties) affect the final trim size. So make sure to use bleed margins to print to the edge, and safety margins to fit your art.
Use high-quality images and vector graphics
If available, save your artwork as a high-resolution Adobe PDF with Press Quality selected to avoid poor print quality. PDF is an open format, and some PDF elements are not printable. We suggest applying PDF/X to ensure all elements of your art file can be printed.
- Minimum 300dpi resolution (at print size)
- Embedded fonts are 5-points size or greater
- Lines are 0.5-points thickness or greater
- Graphics are embedded (not linked)
- Minimum barcode size of 80% with quiet zone
Your fonts must be embedded. If you’re not sure, convert your text to outline before uploading your artwork to avoid delays. If converted to an image, pixel-based typesetting of 800dpi is suggested. JPEG, PNG, BMP and other non-copyright images taken from the internet may include settings or artifacts that interfere with print quality. A higher resolution may help. For these and grayscale images, a minimum 600dpi is suggested.
Proofread text for accuracy
Before you order or print your labels, check them One More Time! Have several people look at them for typos or missing information. Nothing is worse than ordering or printing hundreds of labels, only to see a mistake.
Test print settings before mass production
A good thing to do whether you order or print your labels yourself is to do a test run. By printing a sample sheet you can make sure things look exactly how you expect them to before moving ahead.
Conclusion
Designing labels with Illustrator and Avery labels offers a seamless and efficient process for creating professional-quality designs. Illustrator provides powerful tools for graphic design and layout customization, allowing you to unleash your creativity and design visually captivating labels. By incorporating features such as text tools, shapes, color schemes, and typography, you can create labels that effectively communicate brand identity and product information.
Once your design is finalized, integrating it into Avery templates streamlines the printing process, ensuring accurate alignment and perfect fit onto Avery labels. With the combination of Illustrator’s robust design capabilities and Avery labels, you can produce labels that stand out on shelves, leaving a lasting impression on consumers while streamlining the production workflow. This collaborative approach empowers businessees to bring their label designs to life with precision, professionalism, and creativity.

