

Variable Data Printing for Your Product Labels
See how to add variable data to your products
Other articles you might like
Variable data printing (VDP) or variable printing lets you change certain text elements in your label design like the scent of a candle or the flavor of your beverages without starting a new printing run. It’s a valuable tool if you use the same layout and design on your labels but want different text, numbers, or colors on each label. In the step-by-step below we show you how to create variable product labels using Avery Design & Print and our custom printed labels, printable blank labels or our in-store retail packs.
What exactly are variable data labels?
When most people think of variable data printing, they think of address labels and mail merge, barcodes, and QR codes. In fact, Avery offers a free barcode generator if you need barcode or QR code labels. But you can also use variable data printing to change elements of your product labels without changing the entire design. It’s different than having several label designs that would print from individual digital files for each piece of artwork. With variable data printing, the digital artwork file is used along with a spreadsheet to load your variable data into the correct sections on your labels.
The two basic components of variable printing are the document (label) you will be merging data into and the data source that you will be importing the data from. The mail merge function imports information from a data source, which is almost always a spreadsheet, and automatically organizes the data into a specific layout. Follow the steps below to create your variable data labels.
1. Arrange your data properly
Make sure your data is arranged in columns on your spreadsheet or data file. For instance, one column would be for your flavor, one for net weight, one for ingredients, etc. Be sure this information is on Sheet 1 of your spreadsheet.
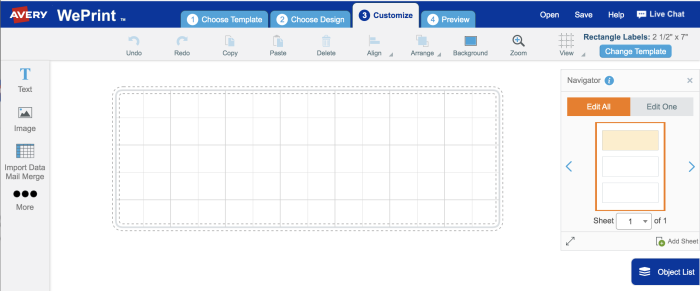
2. Open your label template in Avery Design & Print
Choose the label template that corresponds with your label shape and size, and open a blank template or choose from one of our professionally designed templates.
3. Create your master design
If you are using a blank template, upload your artwork using the Image tool on the left to begin customizing. Add text boxes as placeholders where you will want to add variable data.

4. Select the text box where you want your variable data printed
Click on the text box where you want your variable data printed and then select Import Data/Mail Merge on the left.
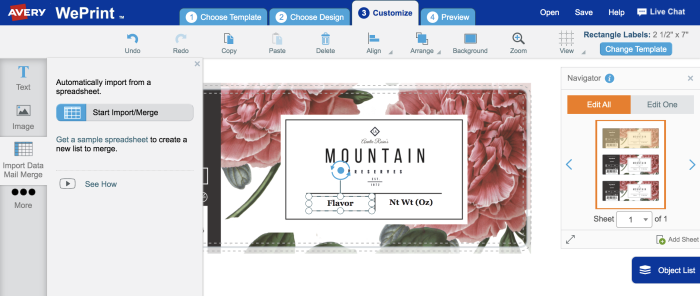
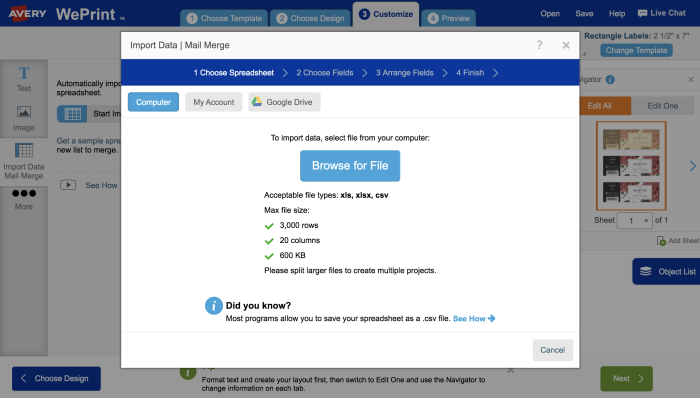
5. Import your data into Avery Design & Print
Browse your computer files for your spreadsheet or data file and begin the import.
6. Choose the rows & columns for variable printing
Be sure to uncheck the top row if it contains column headers or it will print on a label.

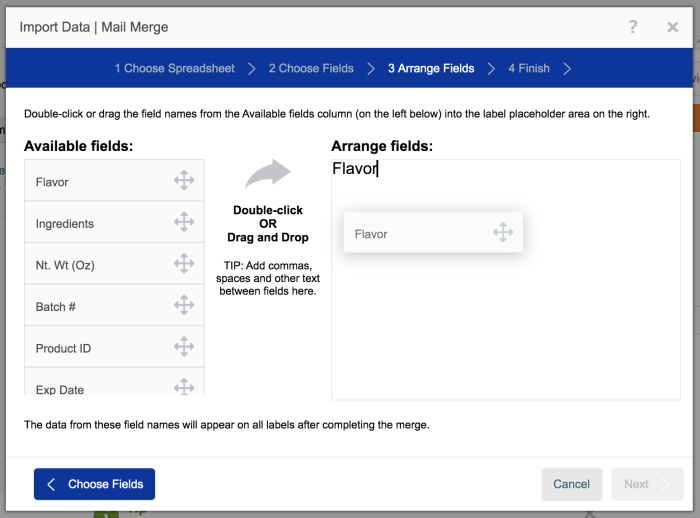
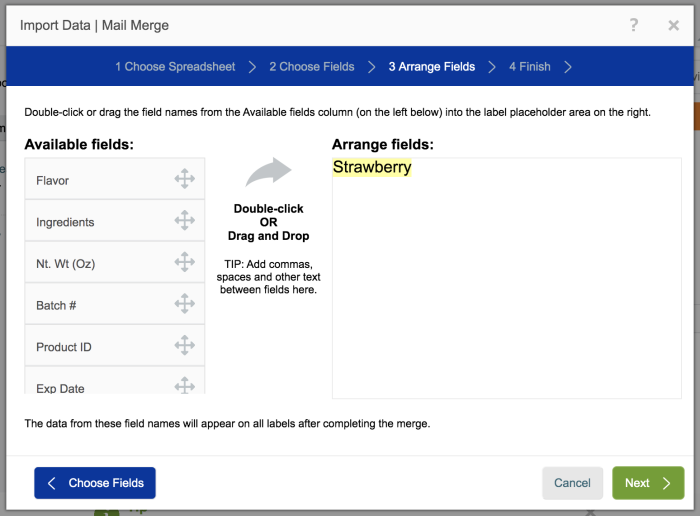
7. Drag & drop or double-click field names
Double-click or drag and drop data that you want to appear in the first text box from the Available Fields on the left to the Arrange Fields box on the right, which represents the text box of your item. (You’ll be able to format your text later.)
Click Next and then Finish. This will return you to the Customize screen where you can make formatting changes. The software will automatically add additional sheets to include all of your rows of data.
8. Merge to other text boxes
To add variable data to the next text box on your label, click on that text box and click Import Data/Mail Merge on the left. Your spreadsheet will already be selected, so you can choose View Merge Fields and drag the next field that you want into the text box you’ve selected. Repeat for any additional text boxes. Note that if your variable data is all going into one text box, you can skip this step.
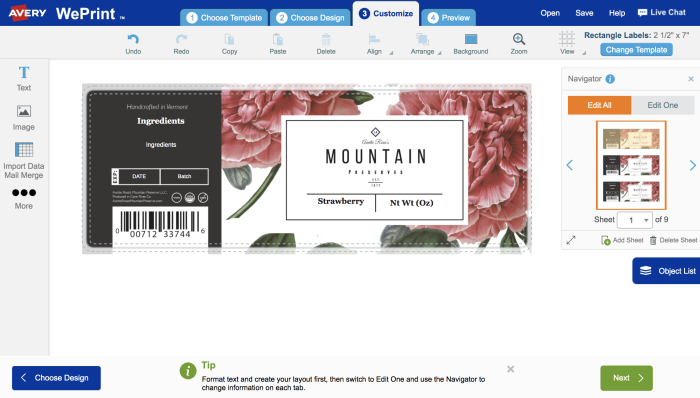
9. Format your labels
You can make more design changes to your labels if needed. Just keep in mind that any changes you make will appear on all items unless you switch to the Edit One tab in the navigator on the right side of your design screen.
A good idea is to make your formatting changes first using Edit All, then switch to Edit One to personalize text and images on individual items. Once you make changes to individual items, they won’t be affected by future Edit All changes.
Be sure to save your project. If you launch new flavors or add ingredients, you can use your base design and choose the Replace Spreadsheet option to make updates.
When you’re done customizing
Once you have your labels set up and ready to print, Avery offers you a variety of ways to order your labels. If you want special materials and finishes for a premium look, try Avery WePrint, our professional printing service. Simply approve your free online proof, pick your material, finish, and quantity, and order. No minimums and a fast turnaround of as few as three business days.
For DIY product labels that you can print yourself on-demand, you can order blank labels with no minimum orders in a wide variety of shapes sizes, and materials. Or you can use our original retail packs that are sold in-store and online.
As always with Avery, if you have any questions or need any help please reach out to our amazing Customer Care Team at (800) 462-8379. We are always here to help.

