Create custom stickers or print your own
Other articles you might like:
Personalized stickers are a fun and versatile way to add a special touch to your projects—whether you’re running a business, planning an event, or just feeling creative. With Avery, you’ve got everything you need to make your own stickers, from professional-quality custom stickers to DIY options you can print at home.
Not sure where to start? We’ve got you covered. Whether you prefer to order custom stickers online or use blank labels or sticker paper to print your designs, we’ll walk you through every step. Ready to dive in? Let’s create some amazing stickers!
Die-Cut Stickers
Creating custom die-cut stickers with Avery is quick and easy. These stickers are precision-cut to follow the exact shape of your design, giving them a sleek, professional look. Here’s how to order your own:
Step 1: Upload Your Artwork
Start by visiting our sticker page and selecting Custom Shape from the dropdown menu. A pop-up window will guide you to upload your artwork. Simply drag and drop your image file onto the screen, or browse your computer to select the perfect design.
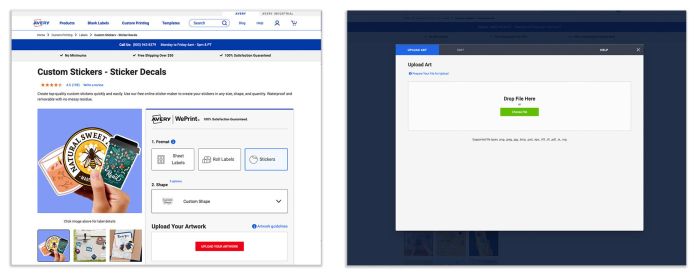
Pro Tip: For the best results, use a high-resolution image file, like PNG or JPEG, with a transparent background if needed.
Step 2: Adjust Dimensions & Select Quantity
Once your artwork is uploaded, it’s time to customize. Adjust the dimensions of your sticker to fit your needs—you can see a preview right on the screen. Happy with the size? Click Finish to return to your order page, where you can select the exact quantity of stickers you want.
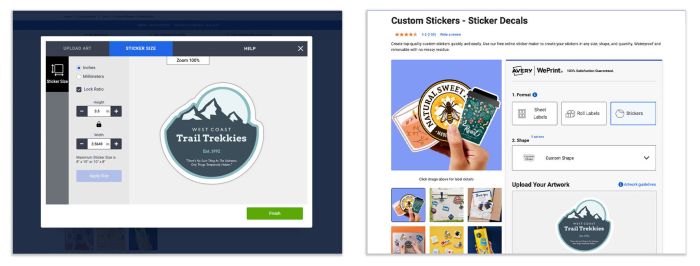
Did you know? Ordering larger quantities often gives you a better price per sticker—perfect for business or event needs.
Step 3: Place Your Order
Review your design, confirm the quantity, and add the stickers to your cart. Once your order is placed, we’ll start creating your stickers and ship them out in as few as two days.
From start to finish, Avery makes it simple to create die-cut stickers that are durable, high-quality, and completely unique to your needs.
Kiss-Cut Stickers
Kiss-cut stickers are a fantastic choice for those looking for stickers that come on a roll with a backing sheet. With Avery, you can design and order kiss-cut stickers in just a few steps. Here’s how:
Step 1: Choose Your Template or Upload Artwork
Visit our kiss-cut sticker page and select the shape you want for your stickers. Next, choose your desired quantity and click Start Designing.
From there, you can either personalize one of our free templates or upload your own artwork. It’s entirely up to you!
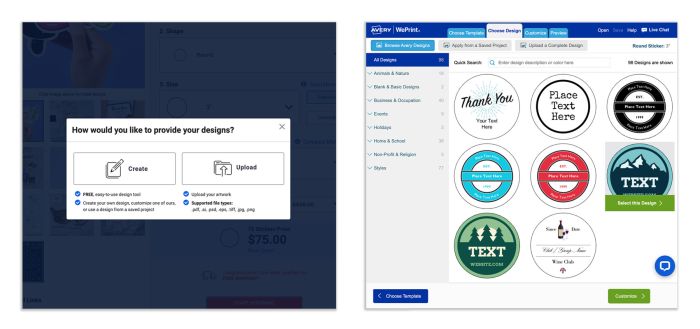
Need inspiration? Our library of free templates includes designs for every style, whether you’re creating stickers for your business, event, or personal project.
Step 2: Customize Your Design
Whether you start with a blank template or a predesigned one, the fun begins when you make it your own. Add personal touches like custom text, photos, or graphics. You can rearrange elements, experiment with different fonts and colors, and make your design truly unique.
- To edit text, simply click the text area and type your new content.
- Use the menu on the left to explore font options, adjust text size, and select colors that match your style.
- The navigator on the right lets you move, resize, or delete text boxes and images effortlessly.
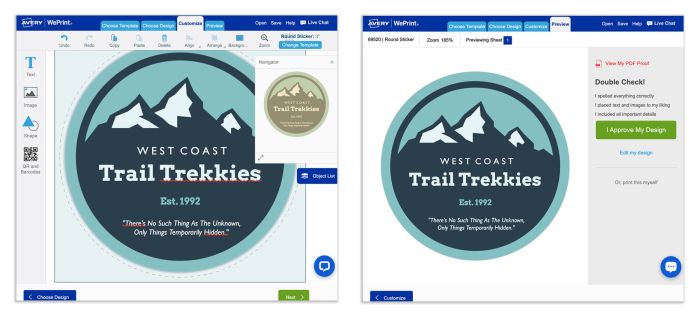
Creative tip: Try layering text over a photo or graphic for a bold, eye-catching look.
Step 3: Save & Place Your Order
When your design is ready, be sure to save it to your Avery account or download it to your computer. Saving your design makes future reprints a breeze.
Once you’re satisfied, choose your quantity, place your order, and we’ll take care of the rest! It’s so easy, you might even decide to start your own sticker business.
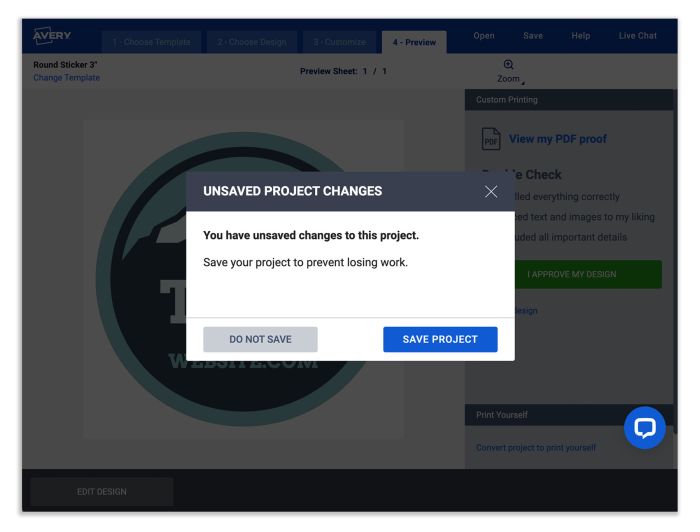
Whether you’re creating stickers for branding, giveaways, or personal projects, kiss-cut stickers are the perfect choice for style and convenience.
Print Your Own Stickers
For those who love a hands-on approach, printing your own stickers at home gives on-demand control. Whether you’re crafting for a business, a party, or just for fun, Avery makes it simple. Follow these steps to bring your designs to life:
Step 1: Open Avery Design & Print
Head over to our software page and click Start Designing. Avery Design & Print is free, user-friendly, and works right in your browser—no downloads needed.
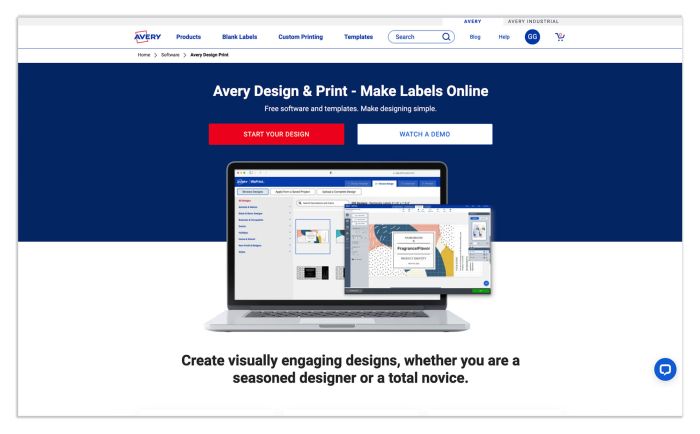
Why it’s awesome: You can access professional-quality design tools without any complicated software.
Step 2: Choose a Template or Upload Your Artwork
Once you’re in, select the Stickers category from the menu on the left. From there, decide if you’d like to customize one of our free design templates or upload your own images or graphics.
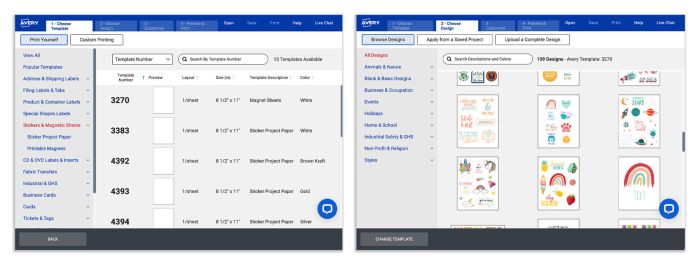
Design tip: If you’re using your own artwork, make sure it’s high-resolution (300 DPI) for the best print quality.
Step 3: Edit & Save Your Design
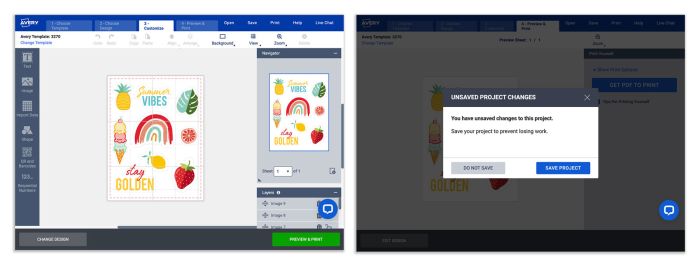
Now it’s time to personalize your stickers. Add text, tweak colors, or layer on graphics to make your design pop. When you’re done, click Preview and Print to check your work.
When you’re ready, click Get PDF to Print. We recommend saving the PDF to your Avery account or your computer so you can easily reprint later.
Choose your materials: Order blank labels by the sheet or roll online, or grab our sticker packs in-store for a quick option.
Step 4: Print & Cut Out Your Stickers
Before you hit print, check out our tips for printer settings to ensure a smooth process. It’s always smart to print a test sheet on plain paper first to make sure everything lines up perfectly.
Once your stickers are printed, simply cut them out and get sticking.
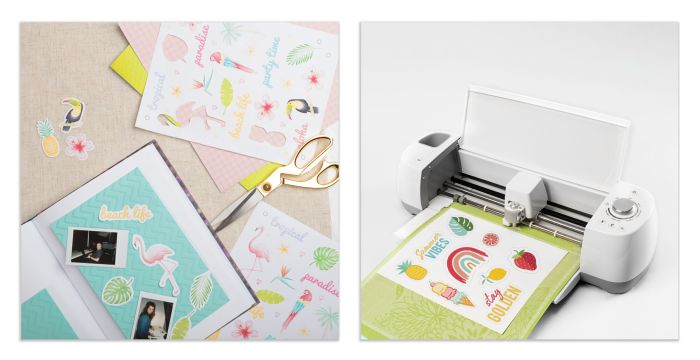
Pro Tip: Use a craft knife or scissors with a steady hand for clean, precise edges.
Printing your own stickers at home is a fun, budget-friendly way to create something uniquely yours. Whether it’s a custom logo or a playful design, you’re just a few steps away from amazing stickers.
Wrapping it up
No matter what you’re creating stickers for—promoting your business, launching your own sticker brand, or just adding some fun and personality to your planner—we’ve got you covered. With Avery, you can choose from professionally printed stickers or the flexibility to print your own at home.
From business to personal, our options make it easy to create stickers that fit your unique needs, whether it’s for branding, events, or personal organization.
And remember, we’re here to help every step of the way! If you have questions about designing, ordering, or printing, our friendly Customer Care Team is just a call away at 800-942-8379. They’re happy to assist you with anything from selecting the right materials to troubleshooting your design.
Whatever your vision, Avery makes it simple to bring your ideas to life.



Hi Michael,
When you go to Preview & Print and select Get PDF to Print you should see the option to either Open or Download the PDF of your project. If you have the Download PDF option, the PDF will download to the computer and the download should appear in the upper right corner of your browser indicated by a downward pointed arrow. If you are still having trouble, please call our Customer Care Team at (800)462-8379. They can share screens with you to see exactly what’s happening when you try to print.
I am having a terrible time trying to figure out how to print a customized label. I have created my label in Projects. I am using template 94513 (6 circular labels per page).
I follow instructions up to the point where I am instructed to click on Print. It doesn’t print. Al;l I get is a hype for Adobe Acrobat Reader (which I already have on my computer(.
How do I print a customized label?