

How to Declutter Your Home: 4 Easy Steps to Try Right Now
Decluttering your home doesn't have to be overwhelming. Try these four easy steps to manage everyday clutter and keep it from coming back.

How to start decluttering your house when it feels overwhelming
The best way to start decluttering your house is to start small and stick to a system. If you feel overwhelmed, it’s honestly pretty natural, especially if it feels like a one massive obstacle to get over. I’ve definitely been there trying to organize my home and viewing it as a “one-and-done” project. But I never really conquered clutter until I made basic changes that made it easier to maintain my organization systems. Of course, organization ideas that help you build systems for any space or project take time. But there four things you can start right now to declutter your home and help keep it that way.
- Make space for personal items in common areas
- Stop reorganizing unused items—donate often
- Set up a system for organizing paper clutter
- Track your progress and stay focused
What does “declutter” even mean?
The term “declutter” simply means removing clutter from a specific area or room. I often find that just defining what I’m trying to do makes it easier to get started. Removing clutter from a single area or room? Yes, I can do that. Reorganizing and redecorating my whole home? Now I have to coordinate the whole family, plus time and finances. But clutter in the living room is easier to handle.
So what exactly is clutter? All the little things crowding around your home, making it feel untidy, or even hindering you from relaxing or being productive. Decluttering is just getting all that extra stuff out of the way so that your home feels relaxing and easy to clean. Those benefits are why I try to keep my own home clutter free, but some people say that clutter can even affect your health.
1) Make space for personal items in common areas
So, decluttering your home isn’t a one-time project—this is true. But it’s also worth remembering that keeping it that way shouldn’t fall on one person’s shoulders. One of my favorite ways to keep clutter from coming back is to get everyone involved. I do this by giving each family member a basket for collecting their belongings from shared spaces.
Here’s how it works: At the end of the day, everyone gathers their personal items into their basket and takes them to their bedroom or another personal space to put things away. In the morning, they bring the empty basket back. It’s a simple daily routine that gives everyone a manageable job and helps keep clutter from piling up in common areas.
How to set up personal baskets for decluttering
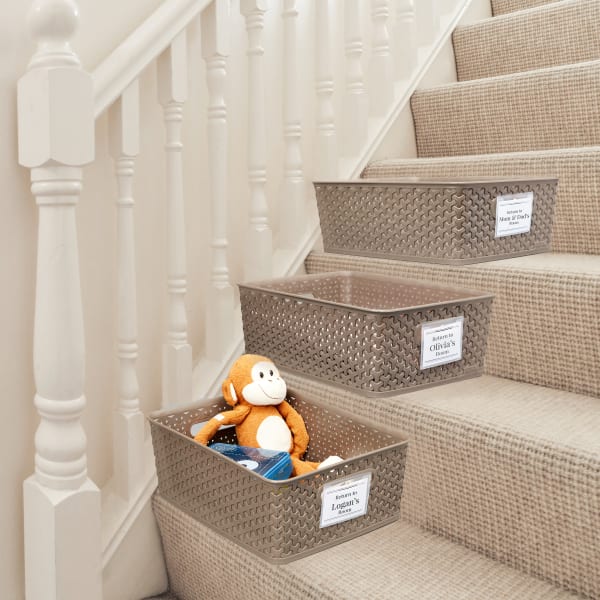
First, choose a spot for your baskets. I like to think of it as a “drop station” where everyone can leave their belongings throughout the day. Near the stairs can work well if you have a two-story home, but anywhere that’s easy to see and reach will do.
Next, choose baskets that fit your space and label each one with a family member’s name. I really like Avery clip badges (74651) because they’re easy to put on and don’t damage baskets or soft storage.
And don’t feel like you need to buy matching baskets or make everything look perfect before you start. You can test the system with cardboard boxes and names written in permanent marker. Once you’ve established a routine that works for your family, you can always choose baskets that better match your décor.
2) Stop reorganizing unused items—donate often
If it’s been a year (or two, or five) since you last dug through your closet, pantry, or garage, you’ve probably got a lot of extra stuff you don’t even use. I’m not too proud to admit that the clutter in my storage shed is old enough to start kindergarten. And that means it’s going to be a much bigger job than it would be if I tackled it even yearly because the stuff I don’t use has piled up.
But here’s the thing, if you want to break the cycle of endlessly reorganizing stuff you don’t use anymore, it’s doable. One thing I that’s worked for me in other areas of my home is setting aside things I don’t need anymore as I come across them. That makes decluttering part of my everyday routine instead of another overwhelming project… like my current shed situation.
Declutter things to donate, fix, or sell
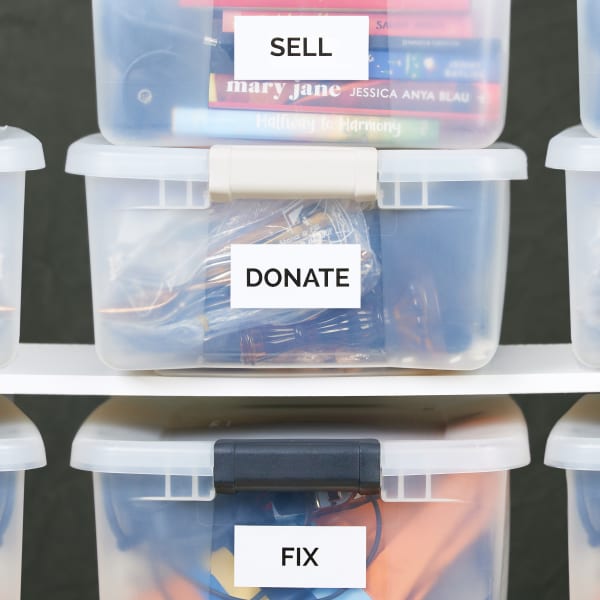
Some clutter is very straightforward. For example, pantry items really only fall into the “toss” or “donate” categories. But clothing and other household items can be a little more complicated. Some things can be donated, others might be worth selling, and some just need a little repair.
I find it helpful to keep separate bins for each so I can sort things as I come across them instead of saving everything for one big cleanout. I use durable removable labels on my plastic bins so I can easily change what they’re used for later.
For example, if something is broken but repairable, I put it in a bin labeled “Fix.” For me, that’s often clothing that I have the sewing skills to repair myself. But the trick is not letting my “Fix” bin become permanent storage for worn-out clothing. If it’s August and I haven’t gotten around to fixing a hole in my sweater from last winter, I reconsider whether it’s worth keeping.
Then there’s the stuff that’s perfectly usable, but I just don’t need it anymore. Those items can be surprisingly hard to let go of, especially when I remember how much I paid for them. Having a “Sell” bin gives me a place to collect things I can list on eBay, Poshmark, or Facebook Marketplace.
You can also use this system to tackle a bigger cleanout right now. Just grab whatever boxes, bags, or bins you have on hand, label them “Keep,” “Toss,” “Donate,” “Fix,” and “Sell,” and start sorting.
How to choose labels for storage bins
Not every storage bin needs the same kind of label. Think about where you’re storing it, how often you’ll change what’s inside, and what the label might be exposed to.
For example, aesthetics are important to me in my home office, so I like decorative labels that complement my décor. But for the bins in my garage or storage shed, I couldn’t care less what the labels look like. I’m much more concerned with whether they’ll hold up over time and how easily I can change them when I need to.
| Your situation | Best material | Why choose this material |
|---|---|---|
| You frequently change or reuse bins | Durable Removable White Film | Durable protection with an adhesive you can remove when the contents change |
| You want labels that stay in place for long-term storage | Durable Matte White Film | Permanent adhesive and durable film for everyday storage |
| Your bins may be exposed to water, oil, or sunlight | Waterproof Labels | Explore materials designed to withstand tougher storage conditions |
3) Set up a system for organizing mail
Mail is one of those things that can turn into clutter before you know it. It shows up almost every day, and if you don’t have a place for it, those envelopes and papers start piling up. The good news is that you don’t need a complicated filing system to keep it under control. Just a place to collect incoming mail and a routine for sorting it.
What to do with daily mail
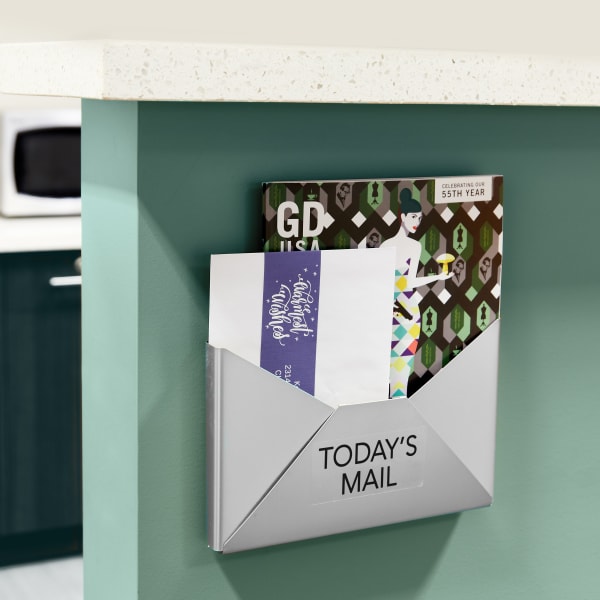
First, choose a spot near the door where you can drop incoming mail. For me, it’s literally right inside the door, on the wall. Then decide when and where you’ll sort through it. You don’t need a dedicated desk or a complicated setup, just somewhere you can comfortably go through the day’s mail.
Personally, I do it when I’m using bullet journal to get oriented for the day. That way it’s part of my existing routine rather than one more chore on my to-do list. But that’s just me. You might find that sorting mail while you’re having your morning coffee works better, or after you walk the dog in the afternoon. If you choose a task or time that feels right to you, it’ll be a lot easier to maintain.
How to set up a mail-sorting station
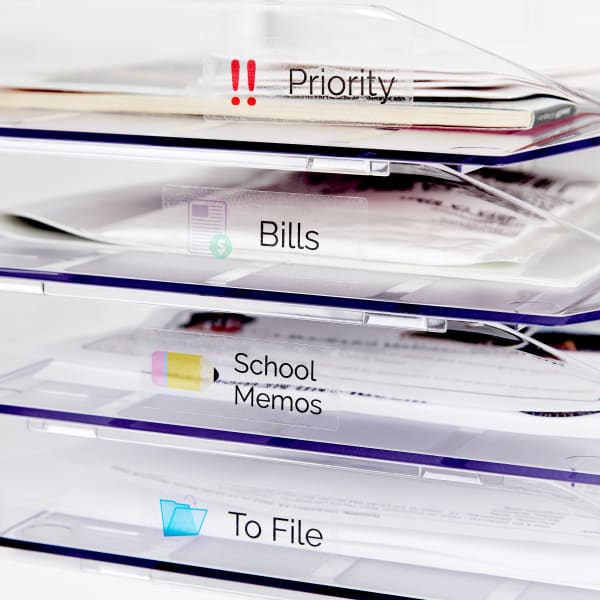
You don’t need much to get started. A wastebasket and a few paper trays or file folders are enough for sorting most daily mail. A shredder is useful for documents containing sensitive information, and you might also want to keep stamps, envelopes, and a letter opener nearby.
Next, label your trays or folders with categories that make sense for your household. I like “Priority,” “Bills,” and “To File.” If you have kids in school, “School Memos” might be helpful, too. The goal is to give every piece of mail a place to go until you’re ready to deal with it.
Pro Tip: Avery 5160 address labels are a fan favorite for a reason. Their 1″ × 2-5/8″ size is also perfect for labeling most letter trays and desktop organizers. And you’re not limited to standard white paper labels. You can order blank labels in the same size in a variety of materials, including clear for a printed-on look and materials with removable adhesive.
4) Track your progress and stay focused
One of the hardest parts of decluttering is feeling like you’re never finished and then losing focus. That’s because keeping your home organized isn’t really something you finish once and forget about. It’s a collection of small habits that make everyday life easier. And when you’re working on something a little bit at a time, it helps to see how far you’ve come.
I’m a big believer in making lists and tracking progress. I use a bullet journal every day to keep track of tasks, organize them by priority or project, and check things off as I finish them.
My go-to is a bullet journal, but however you like to plan can work just as well. A simple checklist, calendar, or chore chart can help you do the same thing. And there’s something really satisfying about seeing what you accomplished, especially when a project feels overwhelming.
Try a printable habit tracker
If you like seeing your progress at a glance, a habit tracker is another option. You can use one to keep track of small decluttering tasks, like sorting the mail, putting things away, or setting aside items to donate.
We have a free printable habit tracker design you can customize and print on Avery labels. Add it to a planner or notebook, then mark off each day you complete your goal.
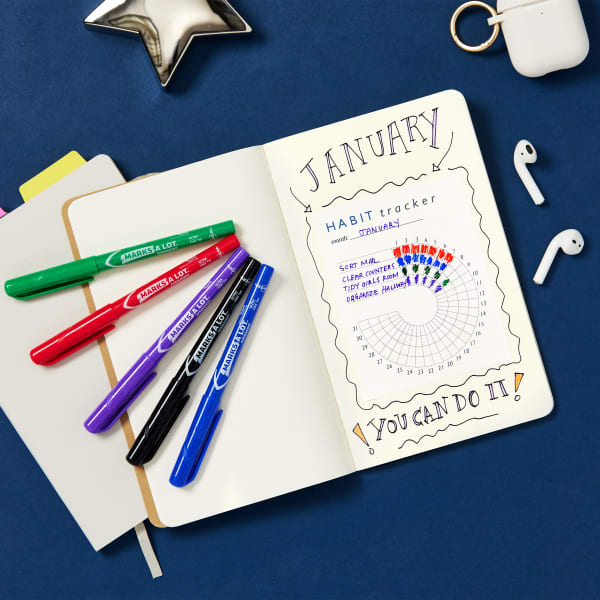
Personalize this habit tracker with your own goals and routines, then choose how you want to print it.
How to personalize labels and tags for home storage
Once you’ve decluttered and decided how to organize your things, it’s time for labeling. And it’s super easy to make labels and tags that are both useful and suited to your space. Maybe you want simple labels that make it easy to find things in the garage, or decorative labels that match your home office. Either way, you can make them yourself with free Avery templates and design tools.
With Avery Design & Print Online, you can start with a blank template or customize a free design. Add your own text, change colors and fonts, upload images, and create labels and tags that work for your organization system.
How to find an Avery template for a product you already have in hand
By far, the easiest way to find Avery templates for the exact product that you have is by entering the Avery product number on the finder page. Or, you can click the link on the product page on Avery.com. If you need help finding your product number, check out this article in our help center or give our friendly Customer Care experts a call.
How to keep your home clutter-free
You don’t have to get your entire house organized in one weekend, and you certainly don’t have to get everything perfect before you start—I can personally attest to that! Small changes to your daily routine can make a big difference over time. The trick is finding systems that work for you and are easy enough to keep using.
So why not try one of these four ideas today? You don’t need to tackle a huge project or completely overhaul your routine. Just start with something manageable and see where it takes you. Once you’ve got a handle on one area, you can use that momentum to tackle another. Before you know it, you’re making progress on that home office, paperwork, or closet you’ve been avoiding.
And when you’re ready for your next project, we’ve got plenty more practical tips and ideas to help you get organized.

