

Helpful Guide with Easy Tips for How to Print Cards
Step-by-step tips for printing cards, postcards, and folded designs at home. Learn alignment tricks, postcard orientation, and how to get great results with Avery tools.
When you’re ready to print cards, we’re with you
I love printing cards at home for family and friends, and even small test batches for my business. I’m an old pro at it now, but I definitely remember how confusing it felt the first time I was actually sitting at my printer, ready to go. I had designed my cards, but I didn’t know exactly how to get them to look as good on paper as they did on my screen. And the classic: my test print came out wonky, and things didn’t line up the way I expected. If that sounds familiar, you’re in the right place.
In this guide, I’ll walk you through the exact steps I use when printing Avery cards. From finding the right templates to getting a clean, accurate print, you’ll be off to a smooth start. I’ll even cover common FAQs about making postcards, custom 4″ x 6″ cards, or printing four designs per sheet. Basically, I’ll share everything I learned (and every mistake I made) along the way, so that you can print your cards the right way—no awkward phase required.
How to print cards at home (step-by-step guide)
Here’s how I print cards at home, step by step, using Avery Design and Print Online (ADPO). The process is the same whether you’re printing folded cards, flat postcards, or even business cards. Once you know where everything is and how the templates work, it all feels much less intimidating.
I’ll walk you through the basics I rely on every time—including how to preview your design accurately before you print. If you follow along with these steps, you’ll get a clear picture of how your cards will look before you waste any ink or cardstock.
Let’s jump in.
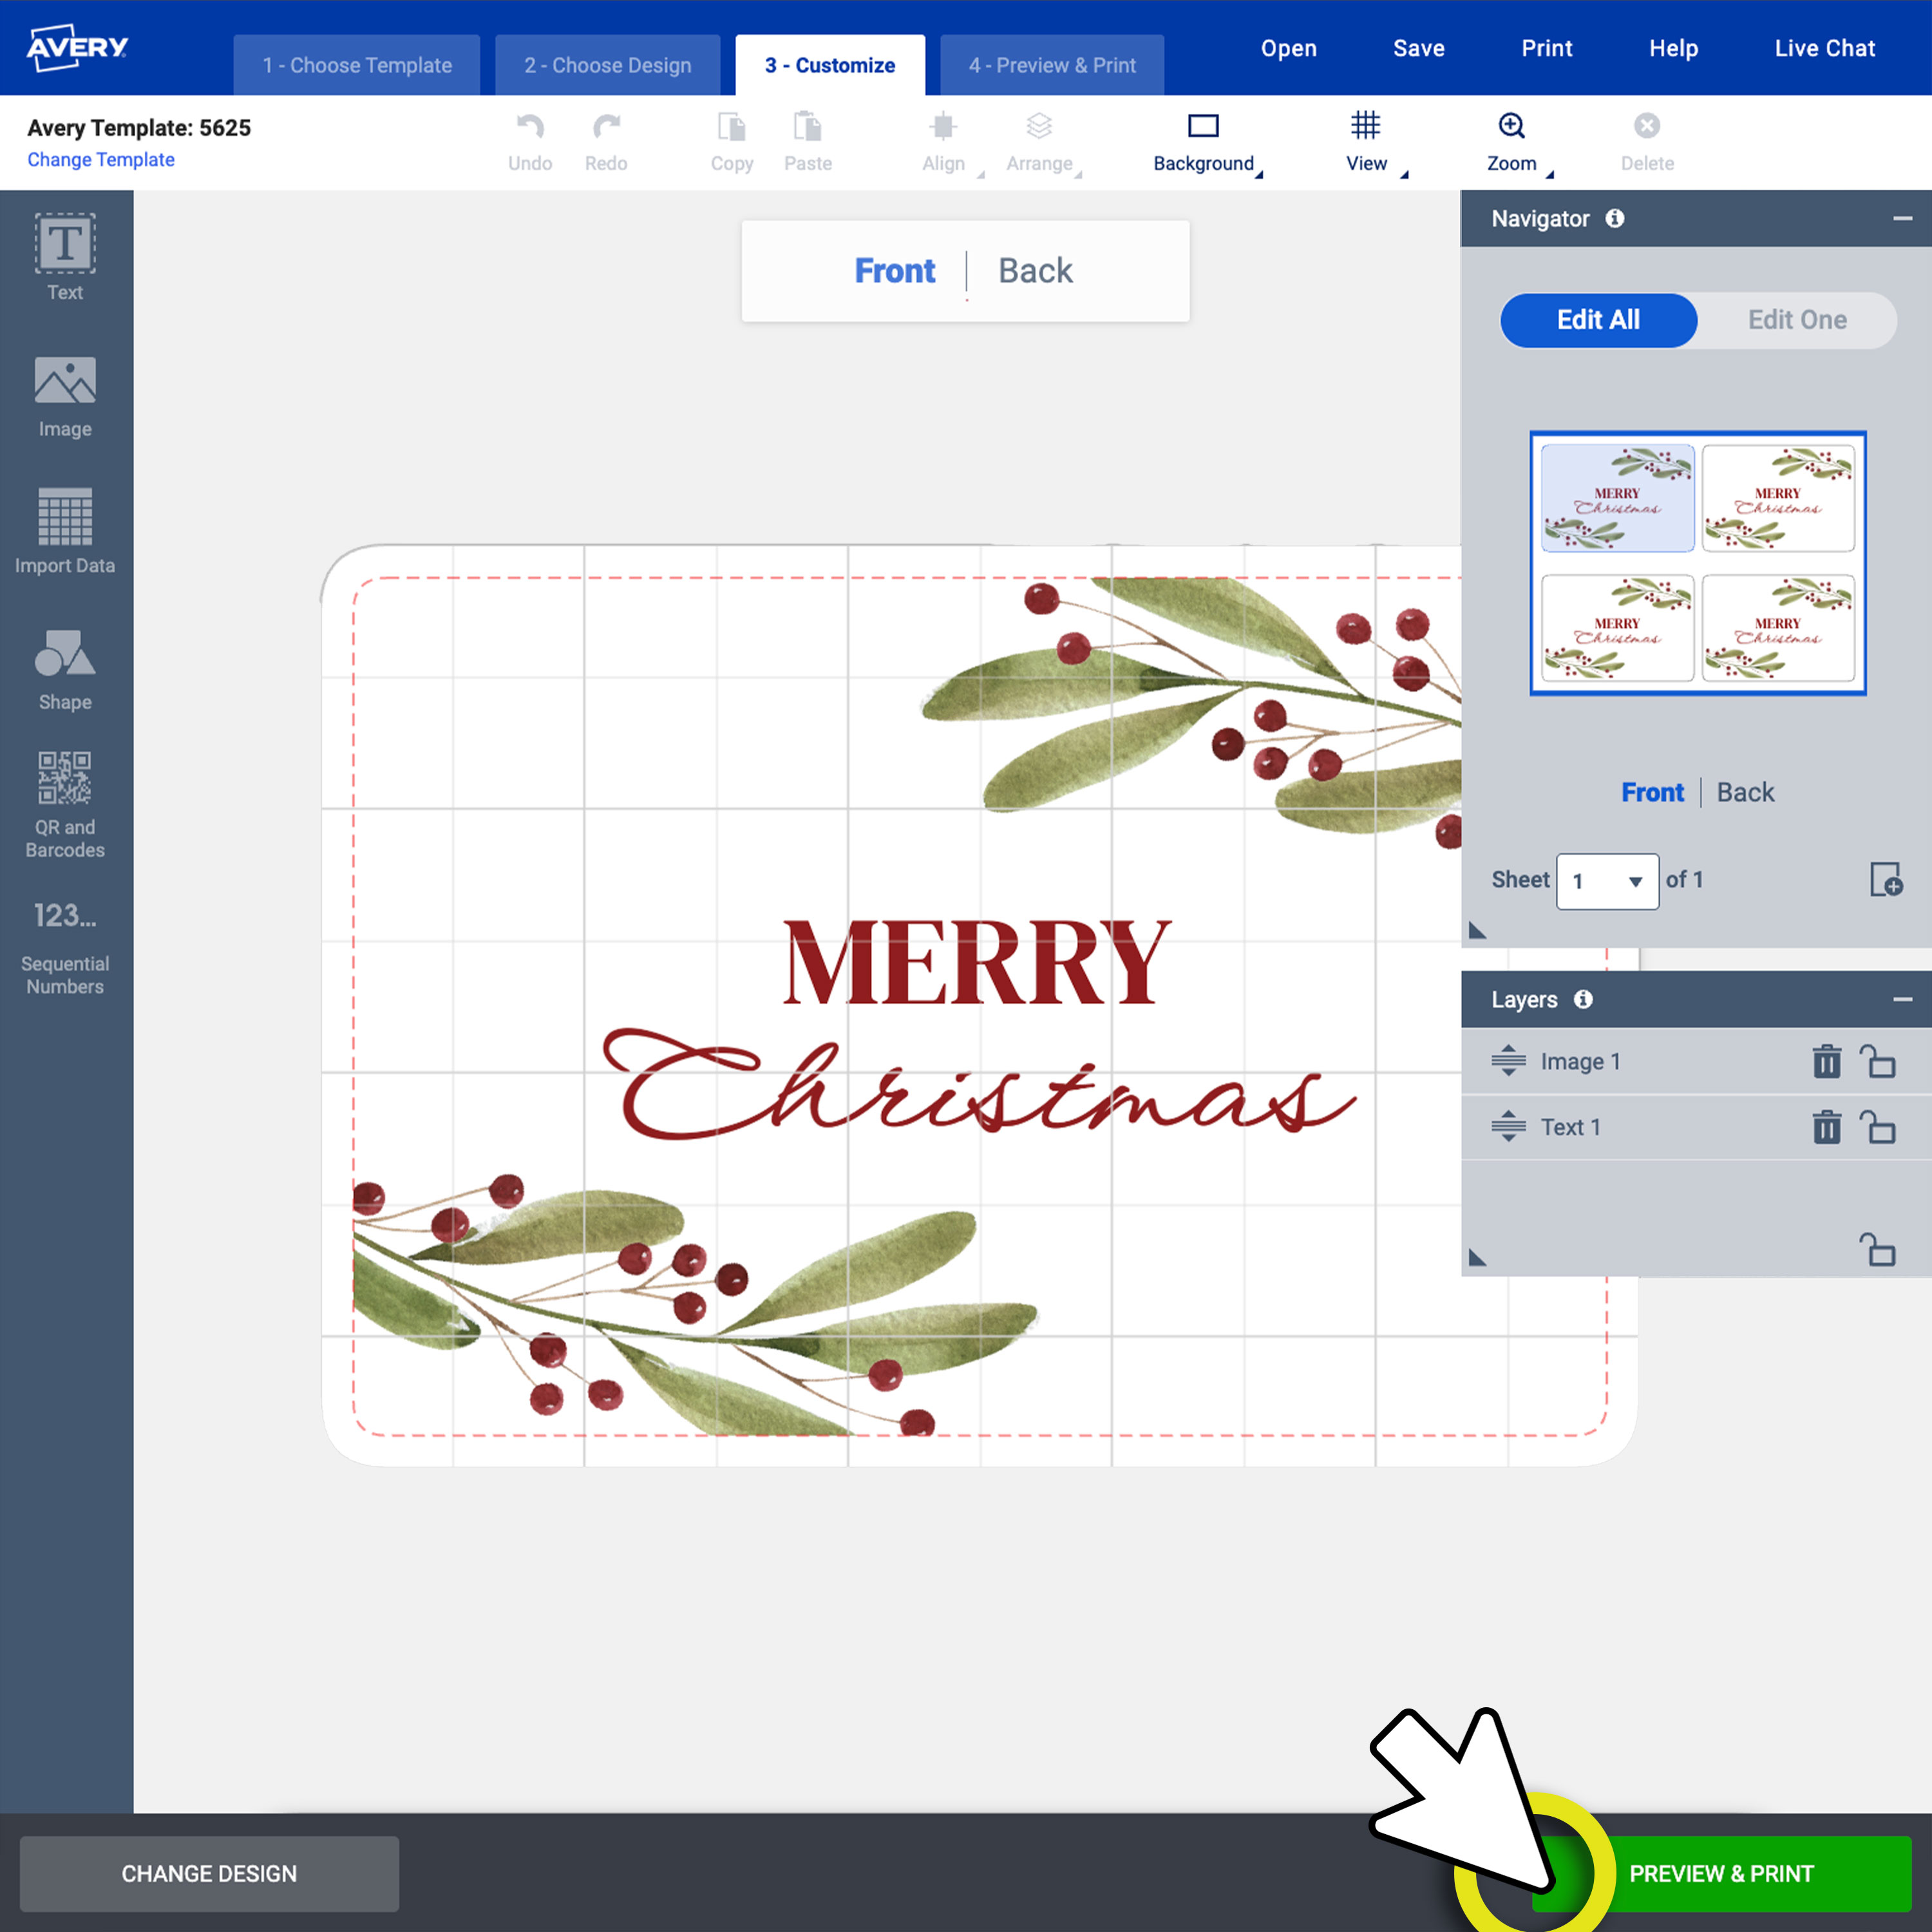
1) Preview and print
Once you’re happy with your design, click the green Preview & Print button. This is the quickest way to see how everything will look before you commit to printing.
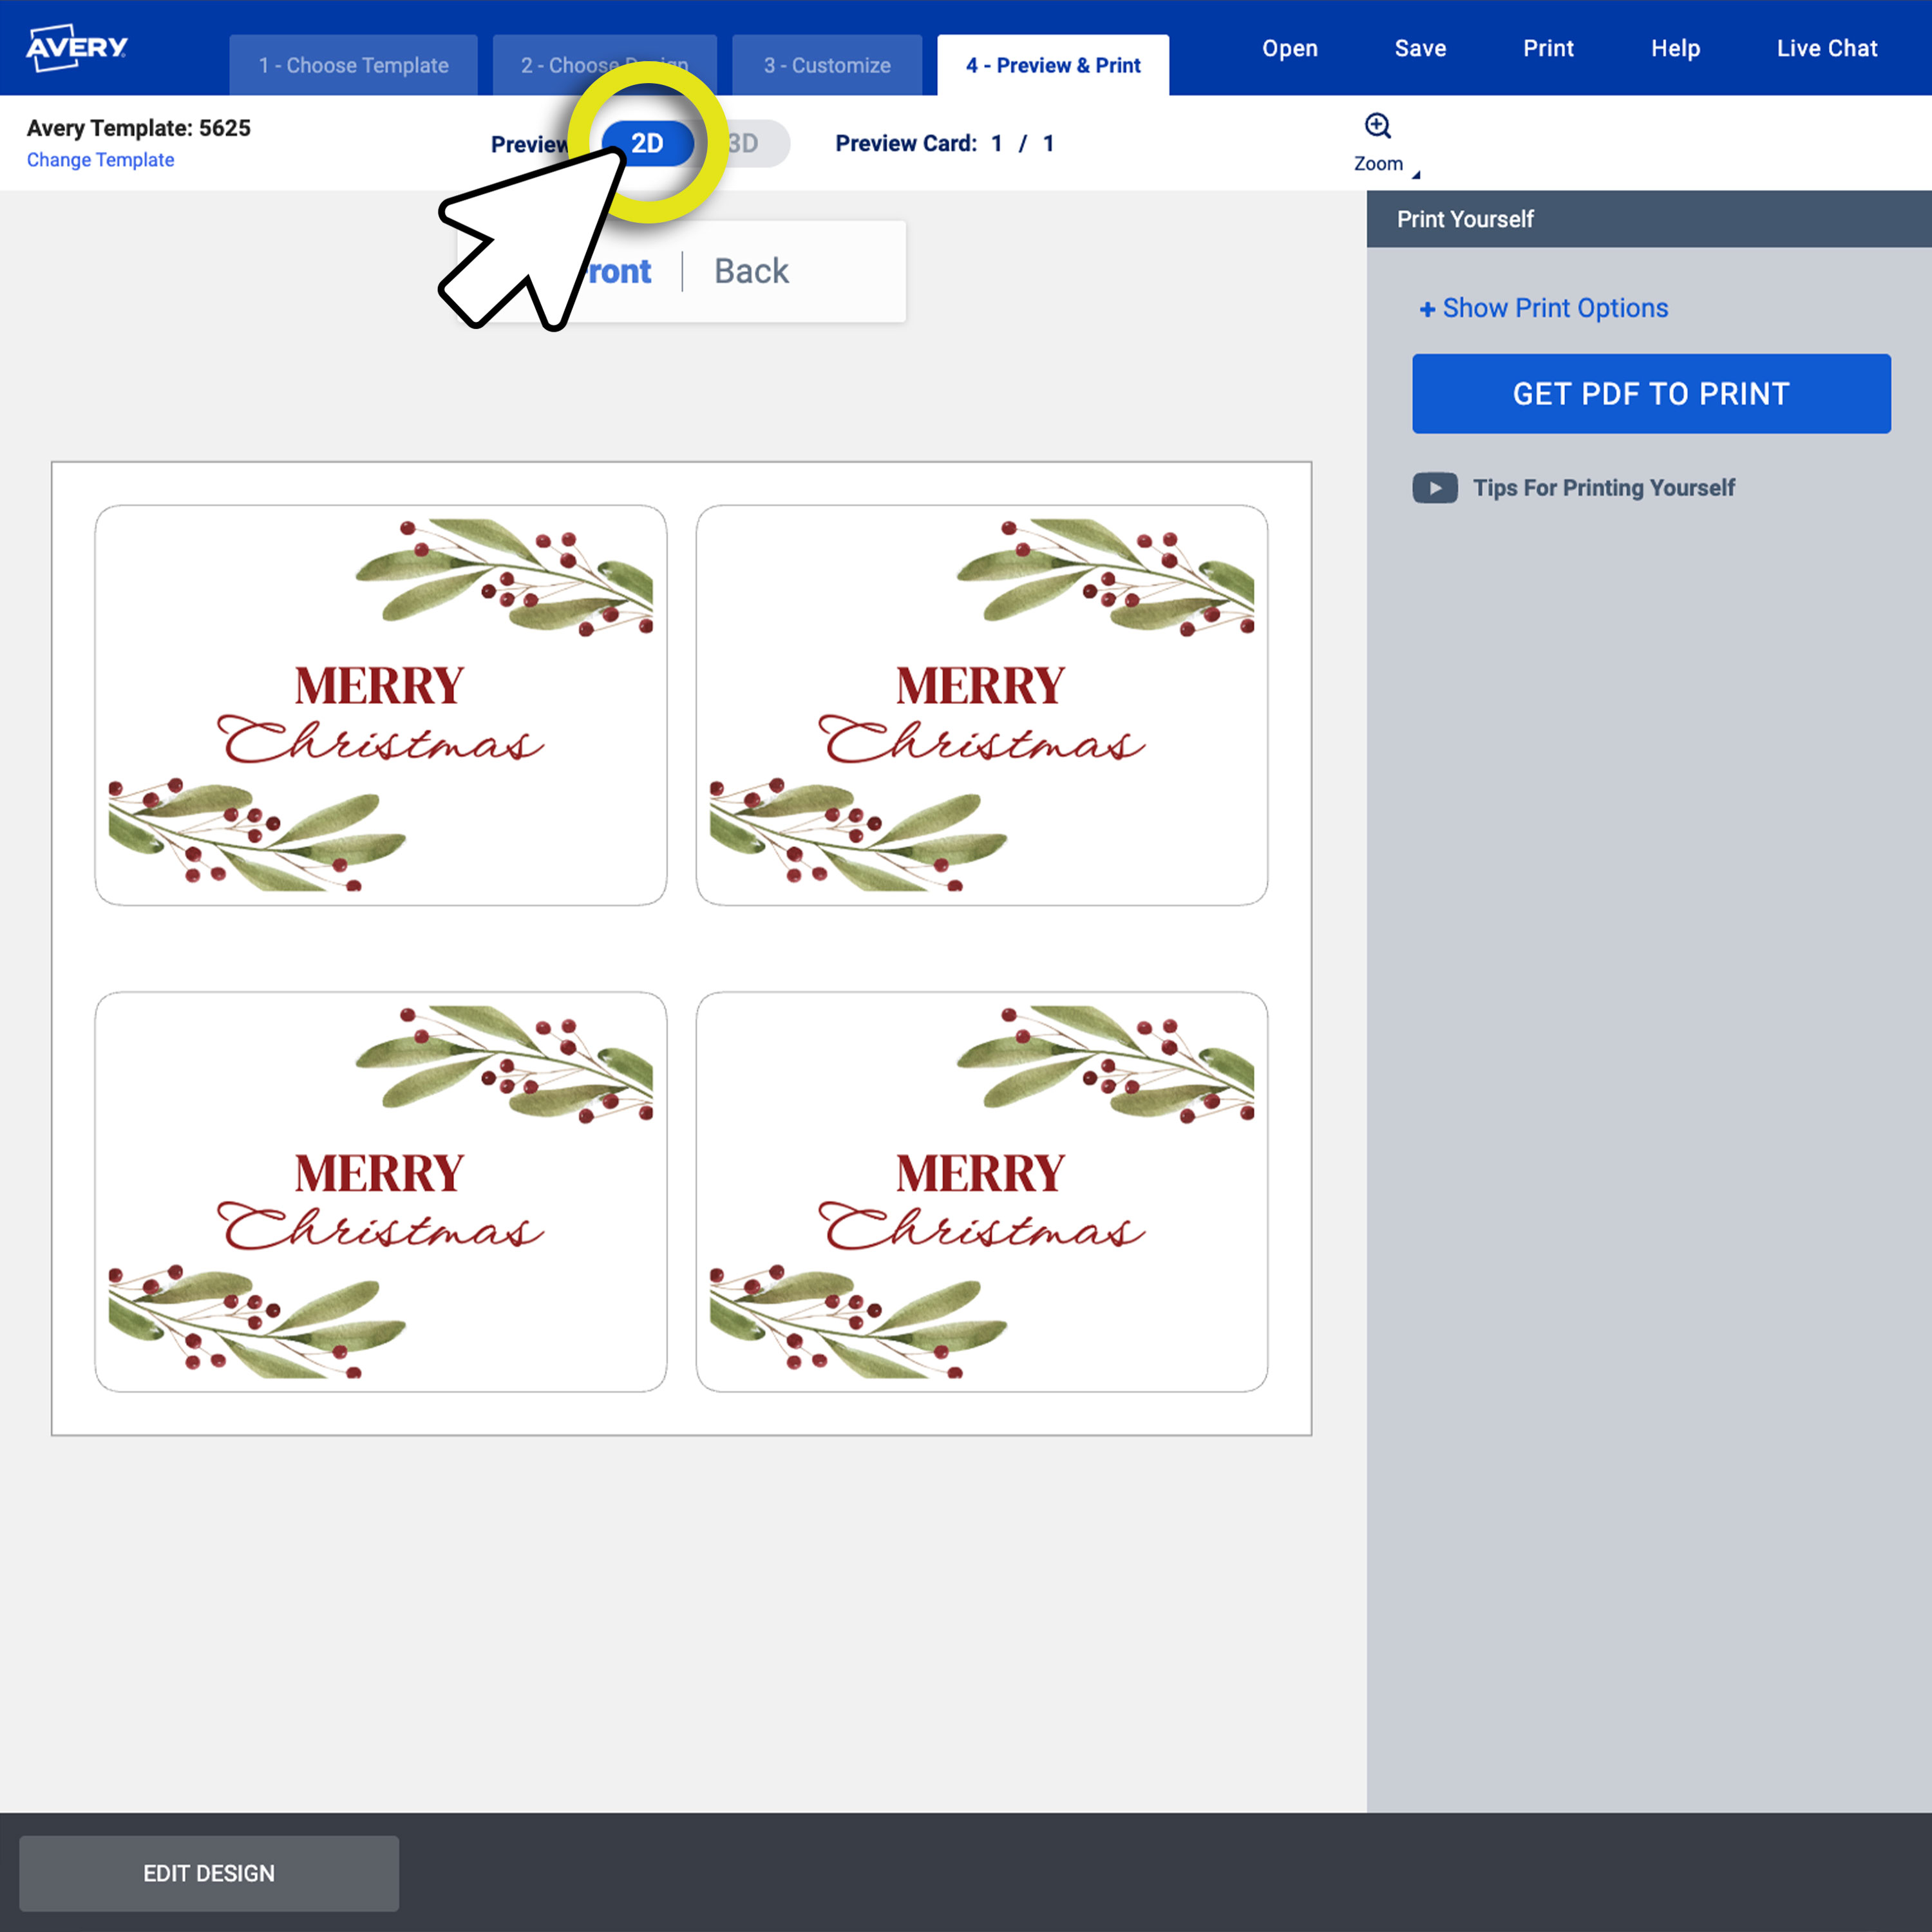
2) Review all panels
On this screen, you can zoom in to double-check the details. You can also rotate a virtual version of your card to see the front and back—or the inside and outside if you’re working on a folded card. I always take a moment here to be sure everything looks the way I imagined.
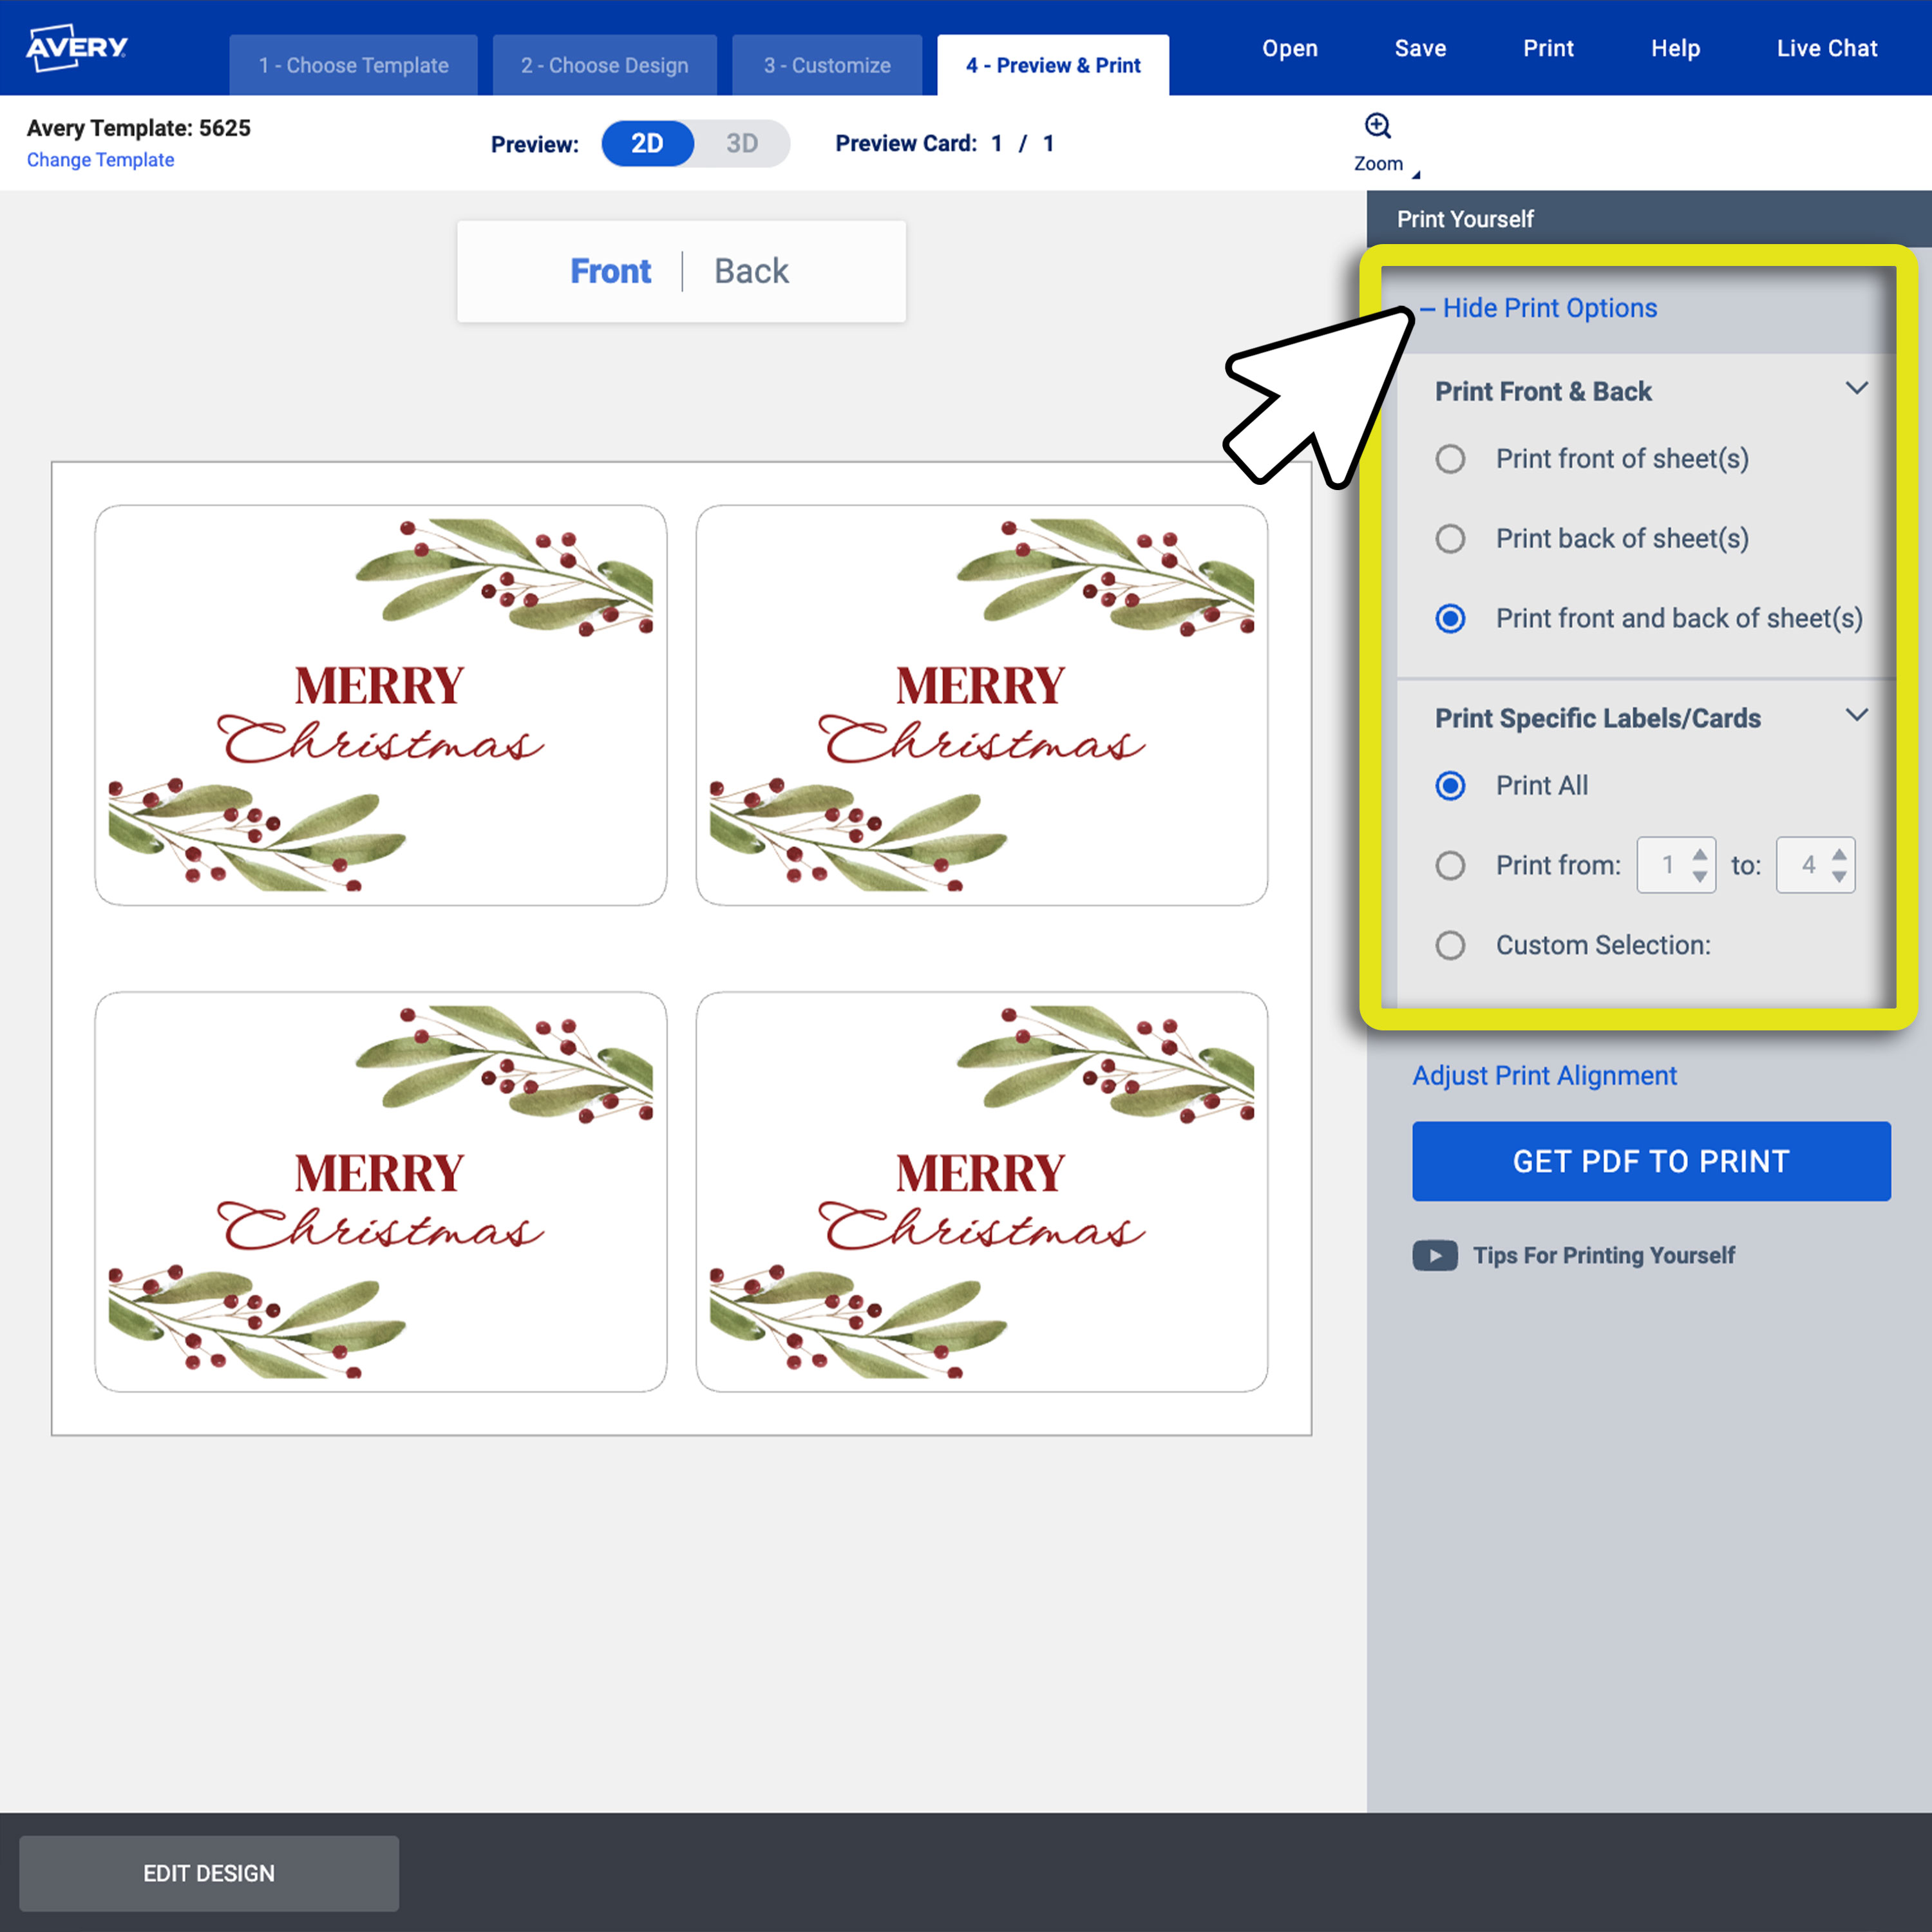
3) Select print options
Click Show/Hide Print Options to choose whether you want to print the front, back, or both sides of the sheet. You can also adjust the print alignment from this panel.
If you’re printing on both sides, don’t miss our Help Center tutorial for printing double-sided cards—it makes the whole process much easier.
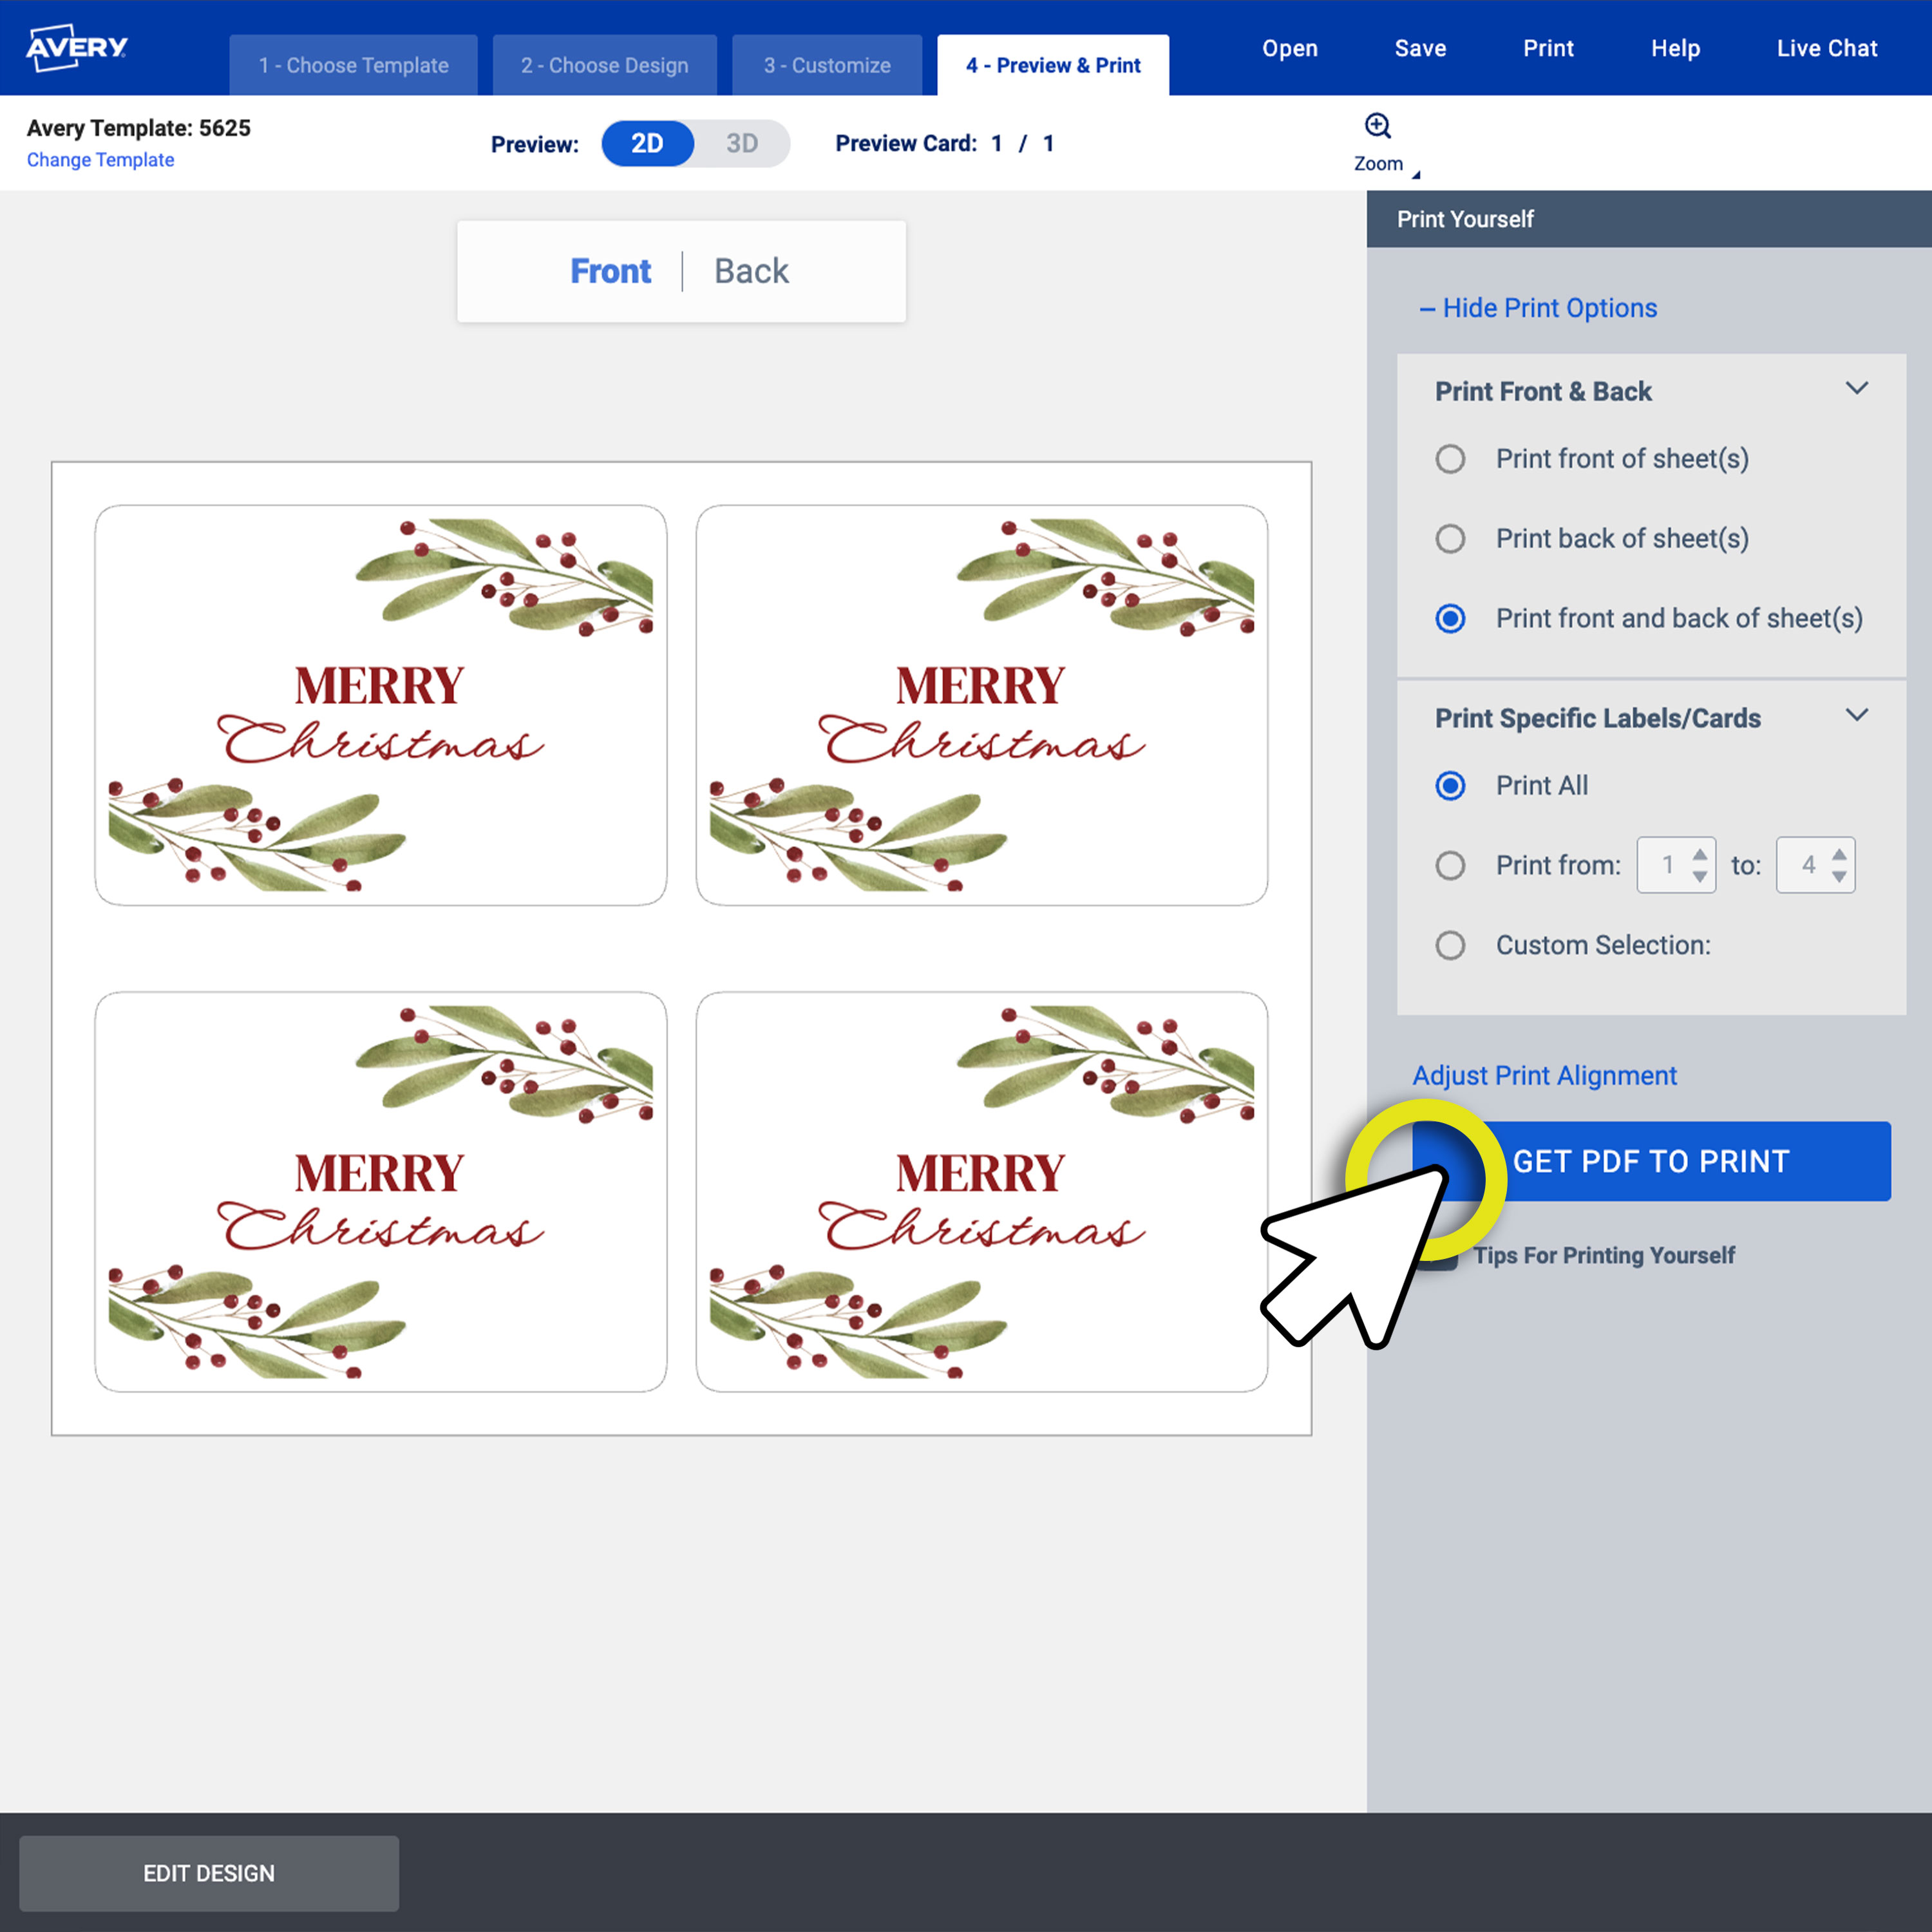
4) Choose “Get PDF to Print”
If you’re printing at home, click the blue Get PDF to Print button and move on to the next step. If you’d rather have us handle the printing, choose Let Us Print for You and follow the prompts for custom printing.
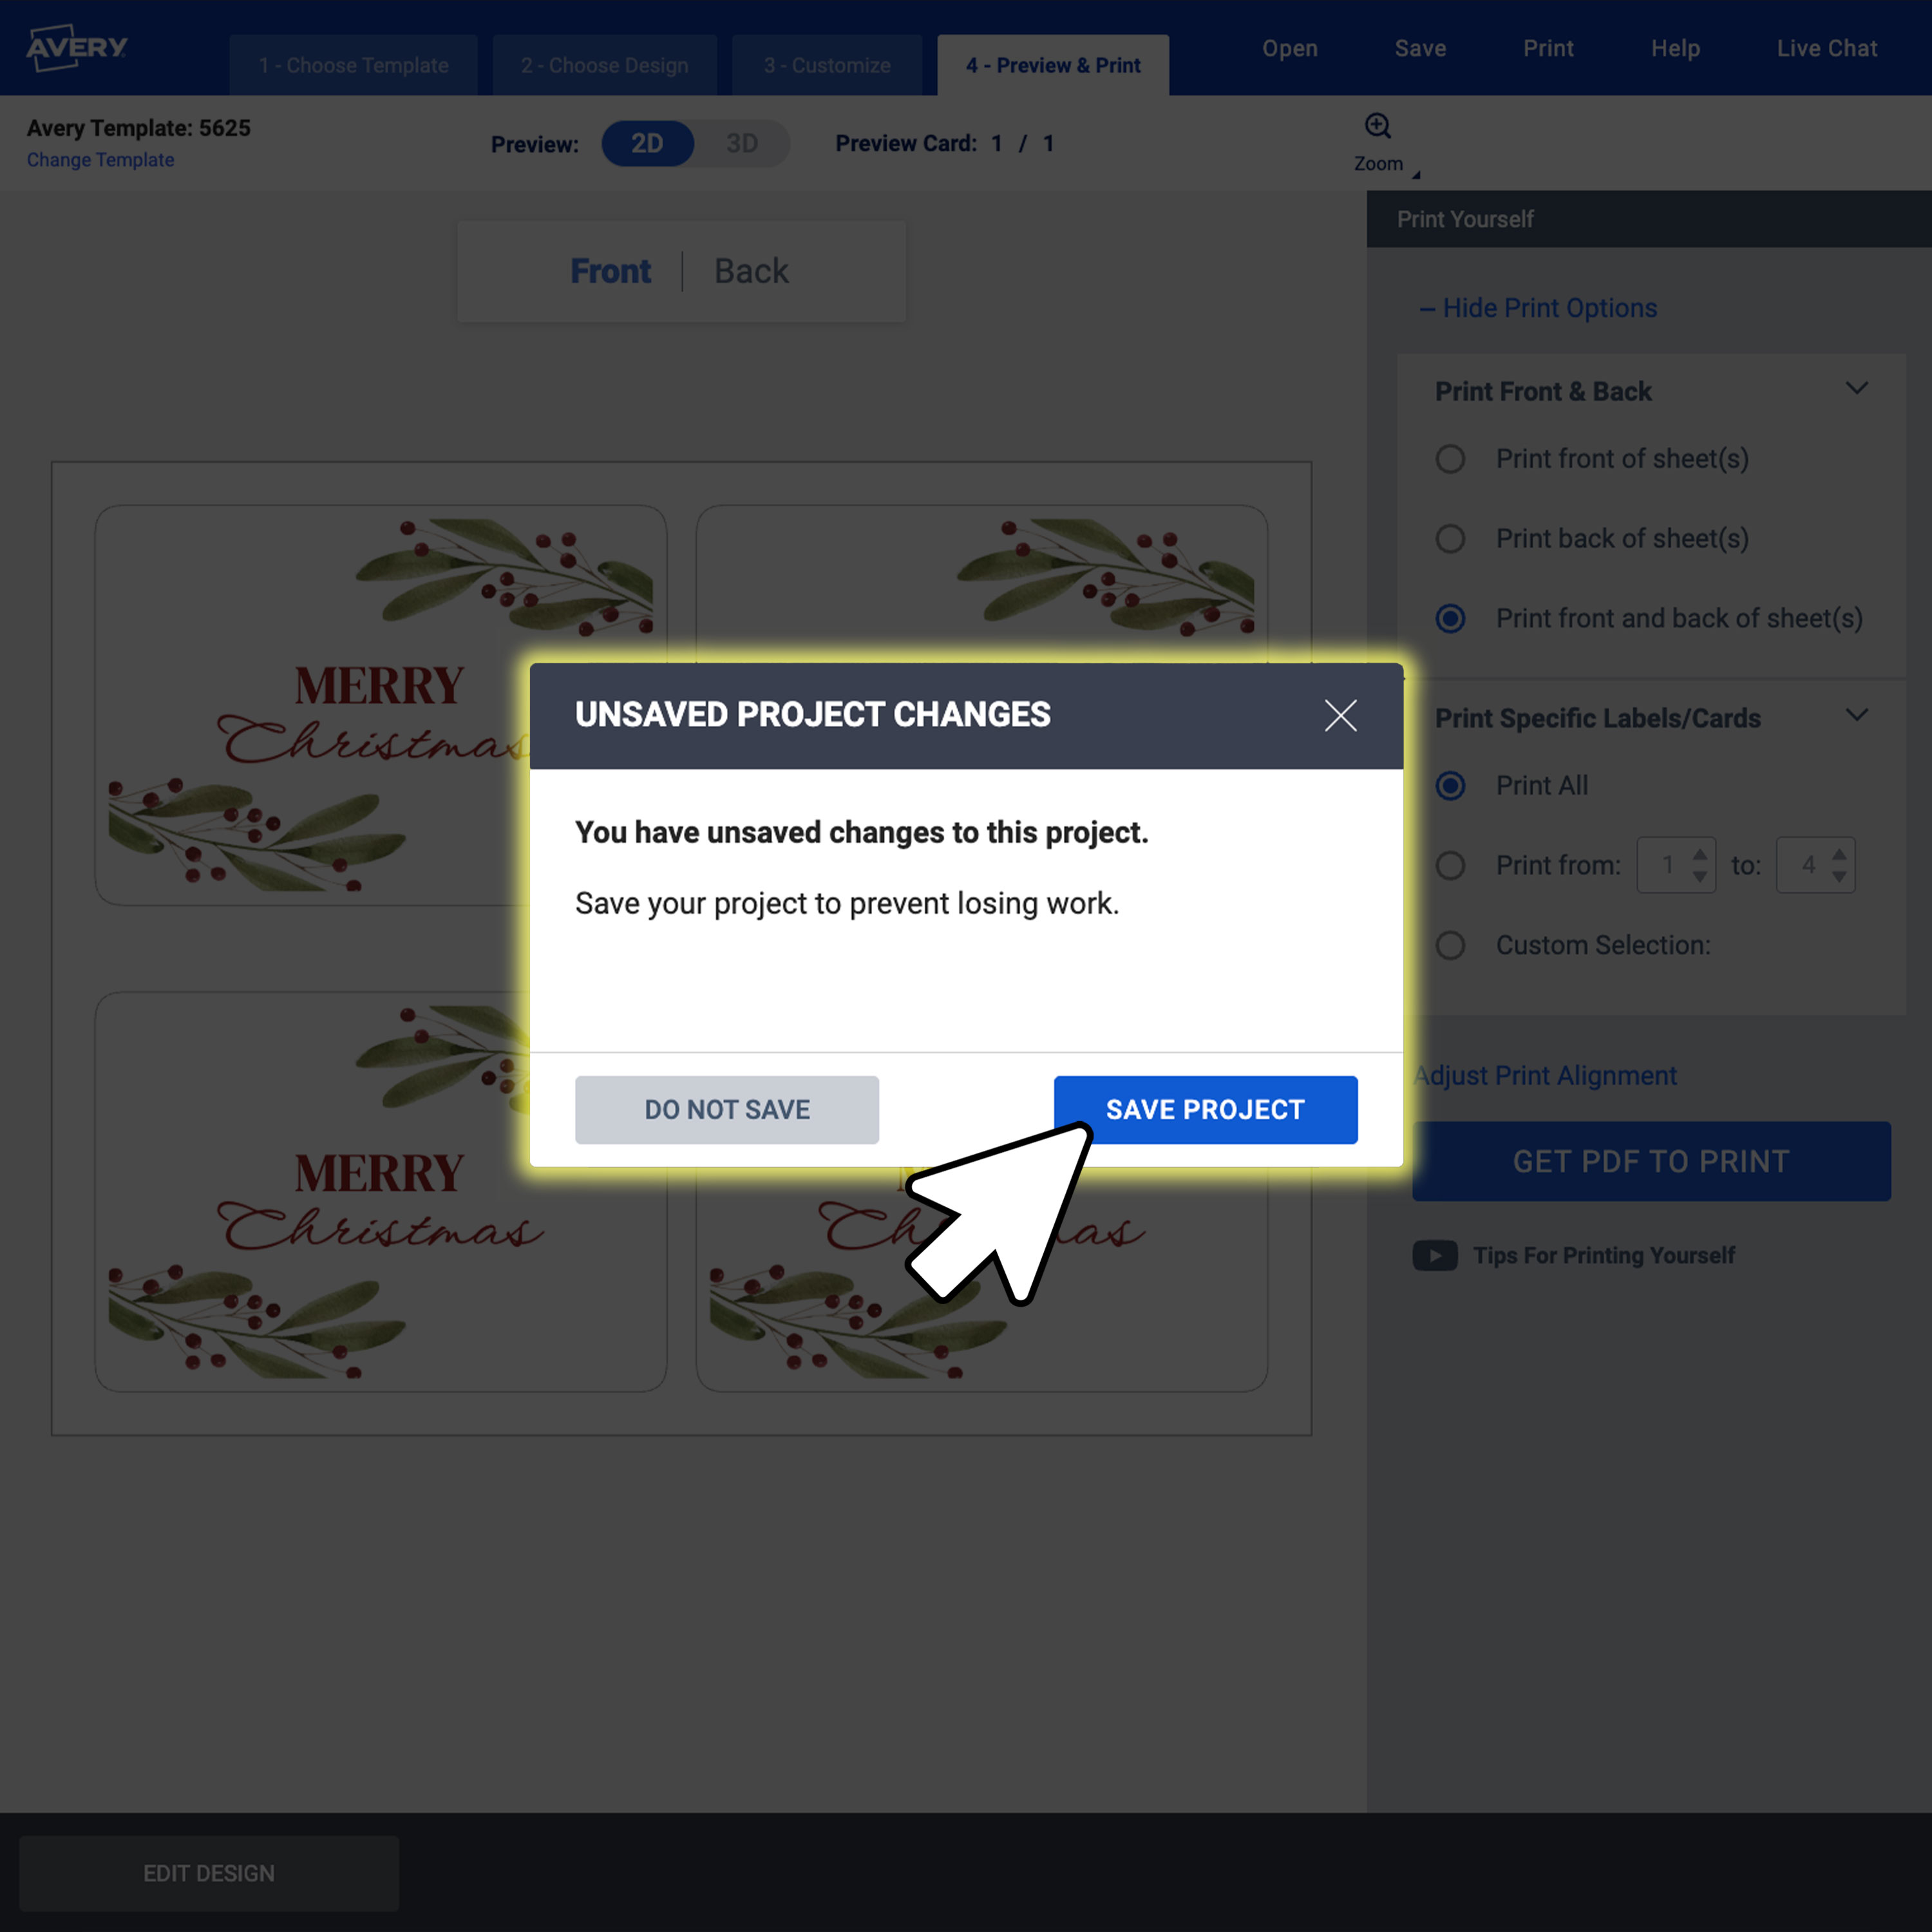
5) Save your project
At this point, you’ll be prompted to save your project. I always recommend doing it. All you need is a free Avery account, and you can store your projects in the cloud for easy access later.

6) Download the PDF file for printing
A window will appear with printing tips and a Download PDF button. Click it to grab the file you’ll use to print your cards. This PDF gives you the most accurate preview of how your cards will look once they’re on the page.

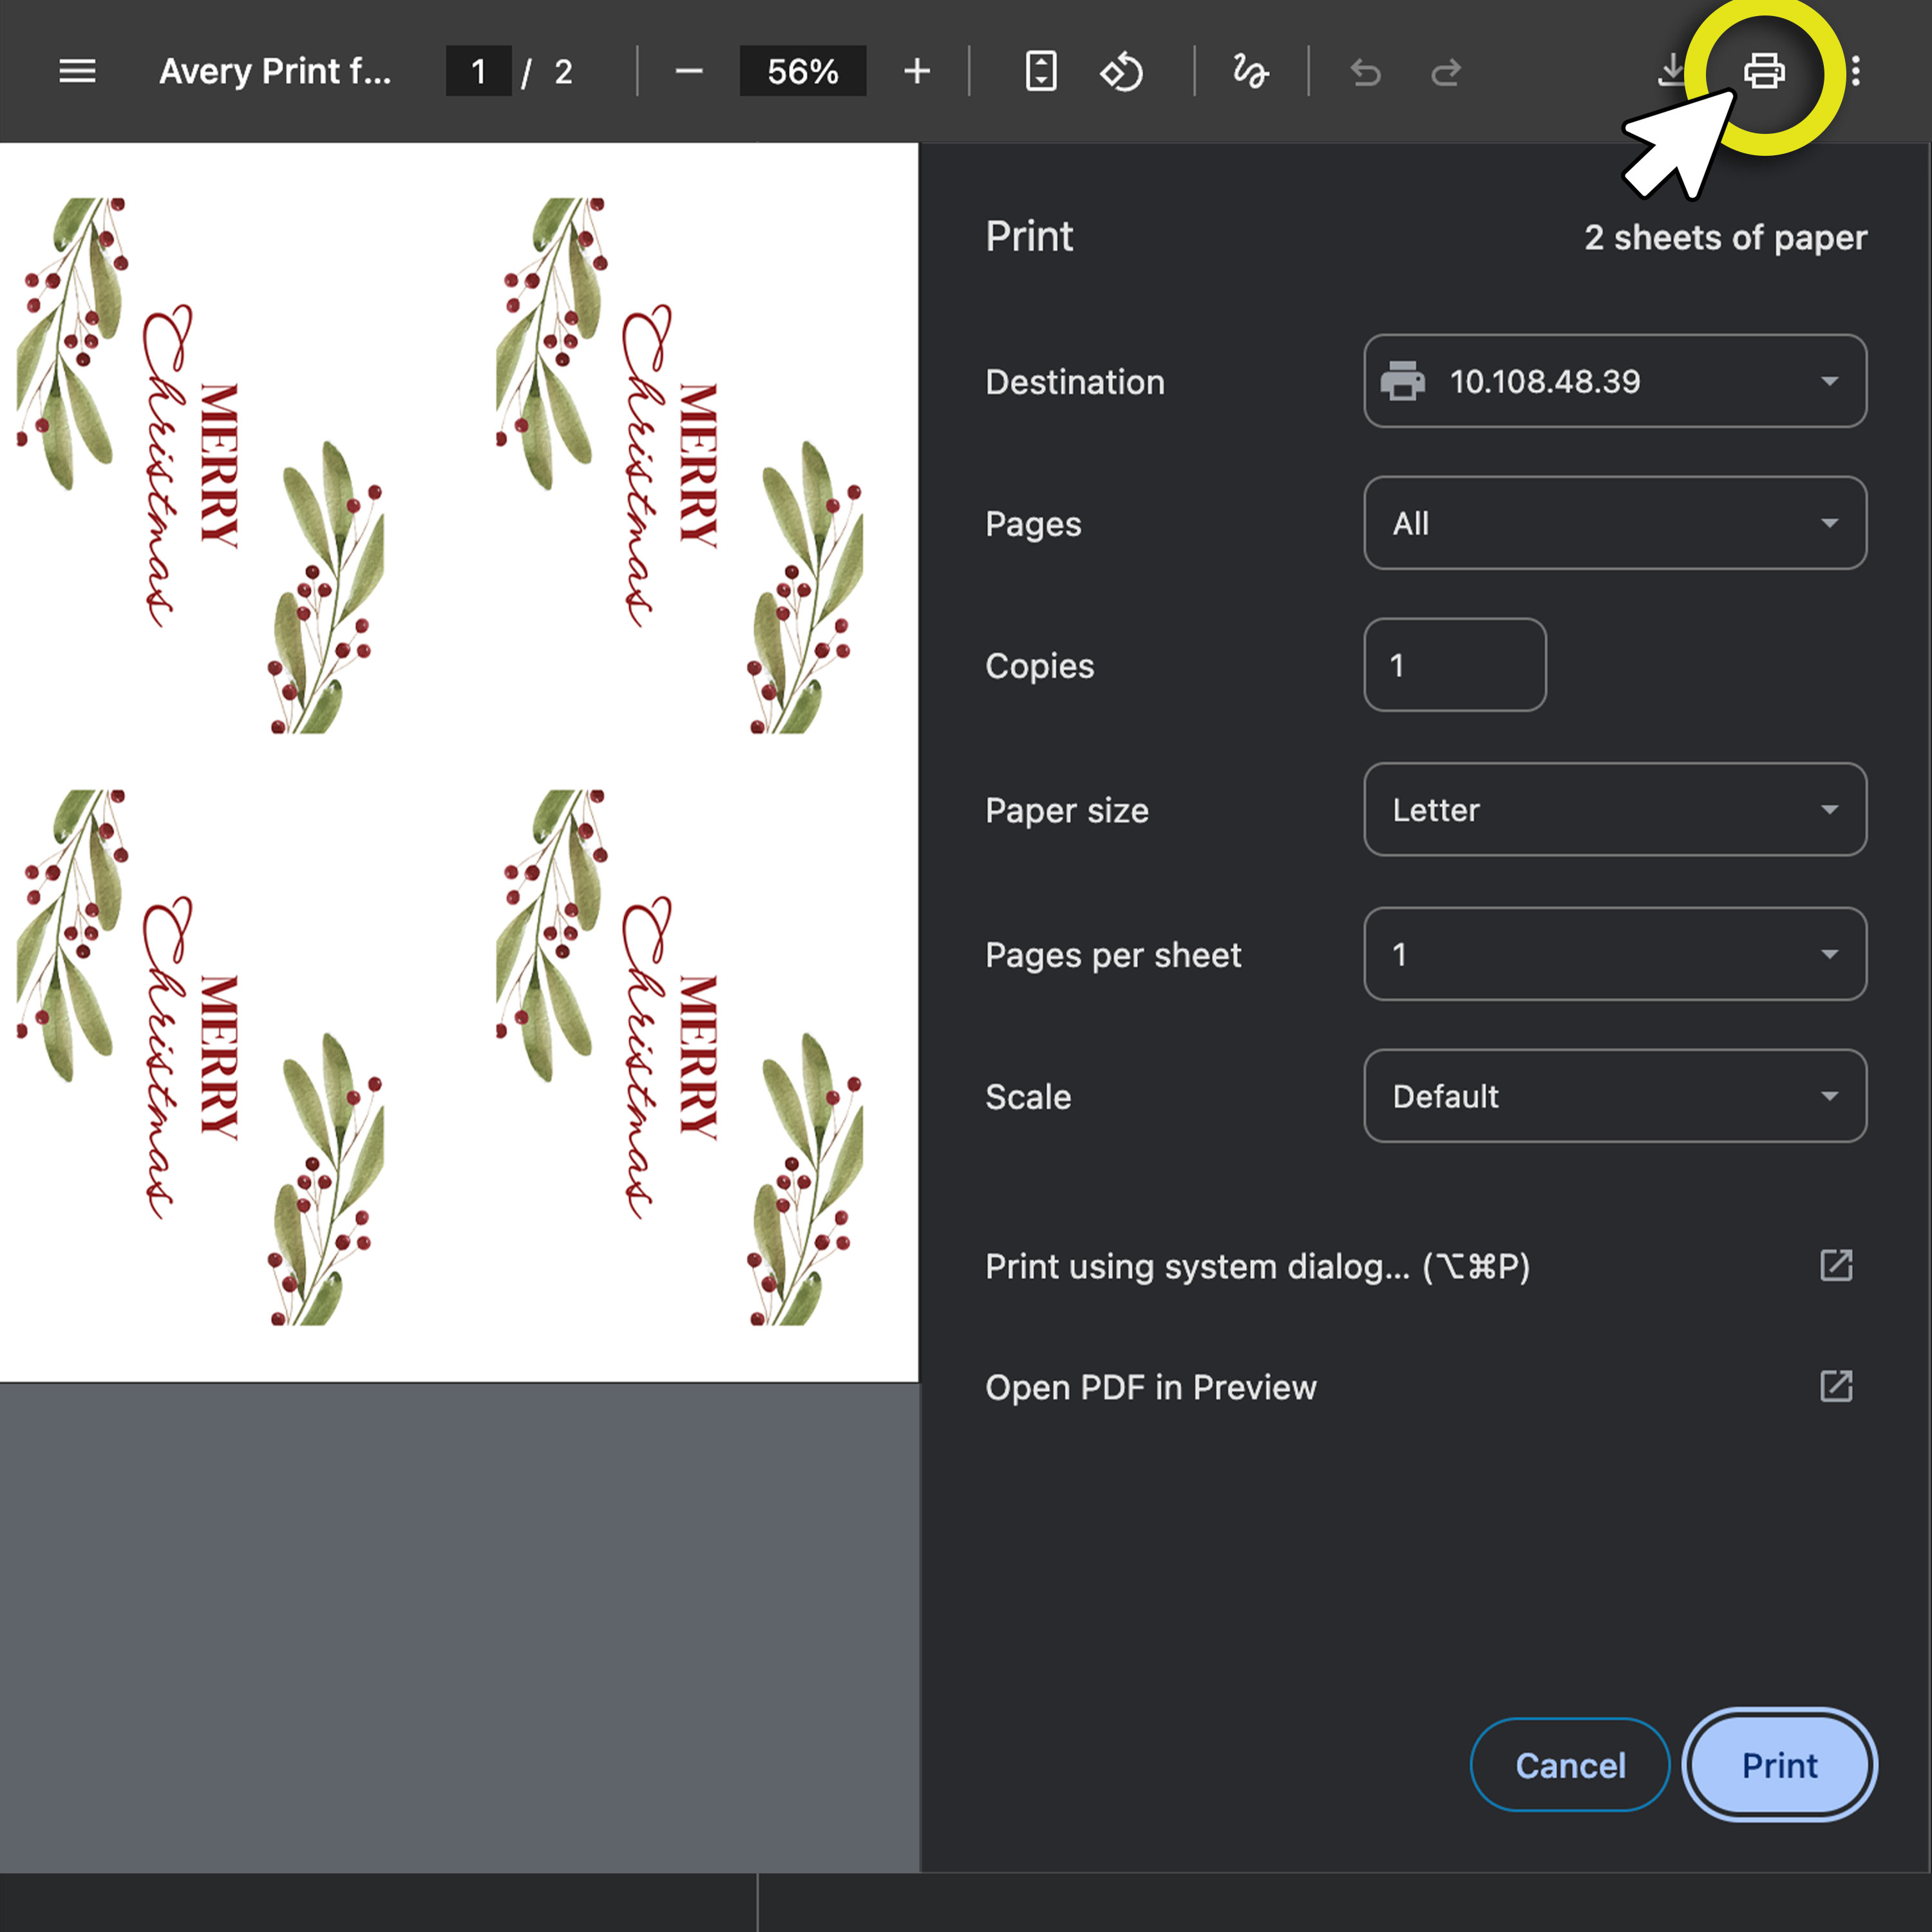
7) Open and review the PDF
Always review your PDF before printing. The preview can look slightly different depending on the browser you’re using, so taking a moment here helps avoid surprises. If you need help with browser-specific printing, this video walks you through the steps for printing from different internet browsers.
The ADPO preview (in step 2) shows you one card at a time. The PDF shows you the full sheet exactly as it will print—super helpful for catching small mistakes.
8) Print (or go back to edit)
If you’re ready to print, go for it. If not, click Edit My Design to make changes before you generate a new PDF. Just remember: any edits you make will require a fresh PDF before printing.
Printing folded cards vs. flat printing folded cards was the hardest for me
The first cards I ever printed were business cards, so they were flat and I only had to worry about the front and back. When I started printing folded cards, that’s what tripped me up. Essentially, you’re still printing on the front and back of the Avery sheet of cards, but your design now has more “panels.” For example, for a note card or greeting card, the front cover, back cover, and left and right inside pages are all different panels. But when it’s time to print, the covers will be on one side of the sheet, and the inside pages will be on the other side.

In order to wrap my mind around how this goes, I always do a practice print on plain paper first so I can make sure the inside pages don’t print upside down. The front and back of flat cards—like business cards or postcards—are easier to visualize, but I still print a test sheet for those too so I can make sure my front and back are facing the same way.
For both flat cards and folded cards, it’s a good idea to check your individual printer’s settings for printing double-sided. Sometimes this setting will feed the sheet through the printer twice, so you don’t have to do anything special. (If your printer does that, you’ve hit the jackpot!) But many printers require you to manually feed the sheet through a second time in order to print on the other side. That’s where printing test sheets on plain paper comes in clutch.
How to print postcards at home (orientation tips)
Here’s the tricky thing: for mailing purposes, the USPS assumes the front of a postcard can be vertical, but the back (the address side) needs to be horizontal. Because of that, the ADPO postcard maker will automatically rotate the back for you. If you design your front vertically, the tool will switch the back to a horizontal layout so it’s ready for addressing. That’s perfect if you’re printing postcards at home and plan to mail them. In that scenario, you don’t have to do anything special.
But if you’re printing promotional postcards to hand out at events, postcard orientation can be a little sneaky if you’ve never done it before. When I printed my first batch, I could clearly see that ADPO automatically rotated the back—but I wanted both sides to be vertical. I had no idea which way to rotate my design so the back wouldn’t print upside down, and let me tell you, there was a lot of trial and error involved.
This is how you solve for it if you’re making vertical postcards: always rotate the design for the back 90 degrees to the left (the top of the vertical design ends up on the left, and the bottom ends up on the right). Then do a quick test print on plain paper first. It will save you a lot of frustration and help you see exactly how both sides line up.
My tip for remembering the solution: just think “top left”—the same spot you naturally start reading. When you rotate the back of a vertical postcard, the top of the design should end up on the left—those two sides always touch.
Printing DIY custom 4×6 postcards
When I need something quick, simple and still professional, I reach for 4″ x 6″ postcards. They’re small enough to tuck into packages, but big enough to hold a clear message, a photo, or a short promo. Using my home printer with Avery cards and tools, I’ve made custom 4″ x 6″ thank-you notes, care instructions, and even loyalty cards. If you’re looking for an easy way to add personality to your shipments without creating a full flyer, 4″ x 6″ postcards hit that sweet spot.
I also love that 4″ x 6″ is a standard USPS size, so I can use them for mail too. If you’re trying direct mail for the first time, it helps to know which postcard sizes qualify for standard postage. This article breaks down how to pick the right postcard size. Plus, Avery postcards print two per sheet on regular 8.5″ x 11″ paper, so I can drop them into my printer without adjusting trays or settings. It keeps the whole process easy and stress-free.
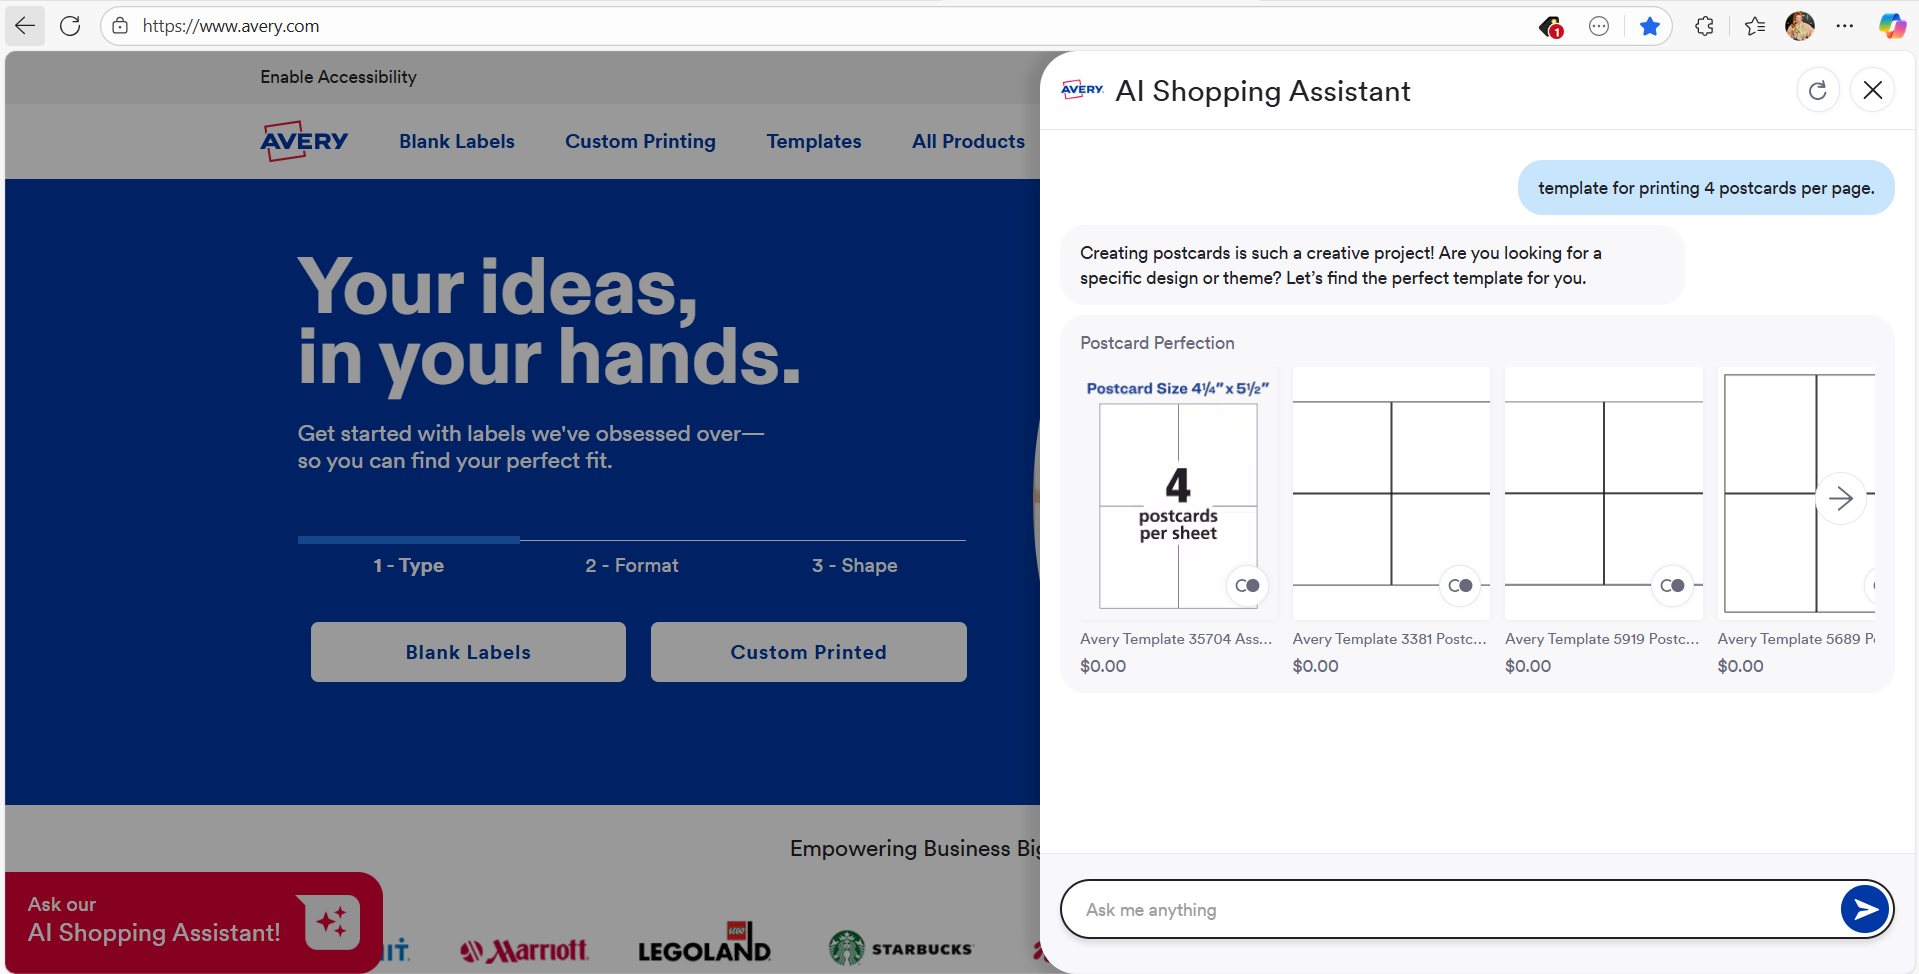
Where to find a template for printing 4 postcards per page
For me, the easiest way to find a template for printing 4 postcards per page is to ask the AI shopping assistant on Avery.com. I just tell it I want postcard sizes that print four to a sheet. You can also browse manually by opening the postcard category (Card Products → Postcards) and filtering by size. Avery 4-1/4″ x 5-1/2″ postcards are a reliable match, since they’re always formatted four per page.
Printer settings for the best card and postcard prints
When I print custom cards and postcards at home, I always switch my paper type to “cardstock,” “heavy weight,” or “specialty.” That small change helps my printer handle thicker sheets without jamming or slipping. I also make sure the scale is set to 100 so the design prints at the exact size I intended. It’s a simple step, but it makes the finished cards look clean and accurate.
Make sure you have the right printer
Before I start printing postcards, I make sure my printer is a good fit for the job. Inkjet printers usually give me the best color and photo quality, especially for postcard designs. I also double-check that the Avery product I’m using matches my printer type. Using inkjet sheets in a laser printer—or laser sheets in an inkjet—can cause smearing, dull prints, or even melted card sheets. If you’re unsure what kind of printer you need, this guide explains the differences and helps you pick the right one.
Practice printing cards on plain paper first
I always do a quick test print on plain paper before using my actual Avery sheets. It helps me make sure the page is feeding in the right direction and that everything lines up the way I expect. I put a small “X” in one corner of the test page so I can tell how it traveled through the printer. This step is especially helpful for two-sided designs or anything with tight margins. Once the test looks good, I hold it over the real card sheet against a bright light to double-check alignment before printing for real.
If something looks off, I adjust the printer settings and try again. And if you ever get stuck, we have a great help article just for troubleshooting printing issues. And you can call our Customer Care team and get a live person on the phone to walk you through the process.

Should you print cards yourself or use professional printing from Avery?
When you’re designing custom cards, you can either print them yourself at home or choose Avery custom printing. DIY is great for small batches and quick turnaround. Professional printing offers premium finishes and vibrant colors, especially for larger orders or photo-heavy designs. Here’s a quick way to compare both options and choose the one that fits your project.
| Feature | DIY Printing at Home | Avery Custom Printing |
|---|---|---|
| Best for | Small batches, test runs, quick projects | Larger quantities, polished or photo-rich designs |
| Convenience | Print immediately using packs you already have | Delivered to your door, no printer required |
| Cost | Most affordable for small batches | Cost-effective for larger orders |
| Print quality | Good everyday quality (depends on your printer) | High-end, consistent, professional results |
| Speed | Immediate | Ships to you after printing |
| Flexibility | Change designs anytime and reprint | Great for final designs you’re ready to produce |
| Ideal uses | Thank-you cards, event cards, prototypes | Custom postcards, marketing pieces, polished gifts |
Tips for getting your custom cards printed
After I finish designing my cards, I follow the same steps I would use for printing at home, then select the Let Us Print for You option in Avery Design and Print Online. A pop-up walks you through two quick checks that help ensure your artwork transfers correctly to the professionally printed product. When I click I’m Ready, the tool prompts me to save my design and then opens a preview screen where I can zoom in, view the project in 3D, and review a full PDF proof.
Always review your PDF file before printing. The preview gives you a general layout, but the PDF shows the most accurate representation of how your cards will look once printed. When everything looks good, I click I Approve My Design. After saving once more, I’m taken to the ordering page where I choose the quantity and card material. Once I make my selections, I click Proceed to Cart and check out as usual.
Frequently asked questions about printing cards and postcards
Choose the right Avery card product, open the matching template in Avery Design and Print Online, and create your design. Load your card sheets into the printer and set the paper type to cardstock, heavy weight, or specialty. Make sure the scale is set to 100 so everything prints at the correct size. I always do a quick test print on plain paper before printing on the actual sheets.
Printing postcards works just like printing cards. Pick a postcard-friendly Avery product, open the matching template, and adjust your printer settings for thicker materials. I also run a plain-paper test print to confirm alignment and print direction before switching to my real postcard sheets.
Yes, 4″ x 6″ postcards are easy to print at home with Avery printable postcards because they come on 8-1/2″ x 11″ sheets. Open the 4″ x 6″ template in Avery Design and Print Online, create your design, and print using the cardstock or heavy-weight setting recommended for your printer.
The quickest way is to ask the AI shopping assistant on Avery.com to show postcard sizes that print four per sheet. But you can also browse the postcard category and filter by size. Avery 4-1/4″ x 5-1/2″ postcards are a consistent option because they’re always formatted four to a page.
For sturdy, professional-looking postcards, choose heavyweight or cardstock-style materials made for your printer type. Avery postcard products are thick enough for mailing but still feed smoothly through standard home printers.
What I’ve learned about printing cards at home
Printing my own cards has taught me that the process isn’t nearly as intimidating once you get a few small habits down. Things like previewing every project in ADPO, practicing with plain paper first, and double-checking the orientation—especially for folded cards or vertical postcards—make a huge difference. Those simple steps help me avoid so many early mistakes, and I hope they do the same for you.
And if you ever want a more polished finish for larger batches or special projects, Avery’s professional printing can take your designs even further. But for everyday making? You’ve got everything you need to print beautiful cards right at home.

