

How To Print White Ink on Product Labels
Make your text and graphics pop with white underprint
Want to know how to print white ink on labels? You’re in the right place. In this guide, we’ll cover what white ink printing is, why it matters, and how to add it to your designs using Avery Design & Print or Adobe Illustrator.
White ink printing, sometimes called white underprint, is a game-changer for creating labels that stand out. It gives your design vibrant colors and sharp, easy-to-read text. Whether you’re designing your own labels or working with a graphic designer, understanding how to use white ink will help you create packaging that grabs attention.
What is white ink printing?
White ink printing adds an opaque layer of white behind all or parts of your design. This layer keeps your text and graphics from looking washed out or transparent, which is especially important for materials like clear film, metallics, or kraft brown.
Think of white ink as a base coat for your colors. It helps maintain accurate color, improves legibility, and makes your design look professional.
Why use white ink?
White ink makes your designs look crisp and vibrant on specialty materials. Here’s how it works for different label types:
Clear labels
Without white ink, clear labels let everything behind them show through, making text and graphics hard to read. Adding white underprint gives your design a solid base so colors stay bold and legible.
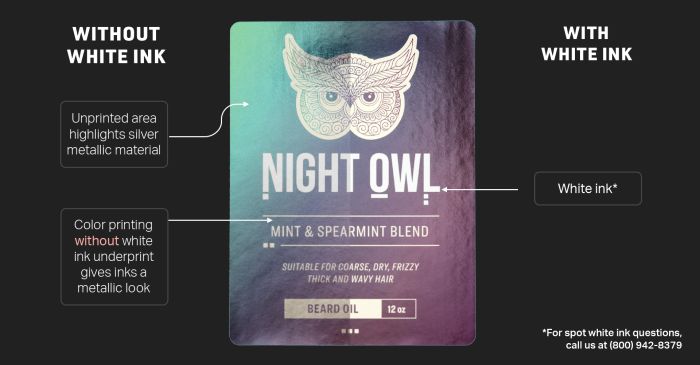
Metallic Labels
Metallic labels have a reflective finish that can distort color. Adding white ink keeps whites bright and colors accurate, but it removes the metallic effect where applied. Leave some areas without white if you want the metallic shine to show.
Kraft Brown Labels
Kraft materials naturally give inks an earthy tone. If you want bright colors, add white ink under your design to keep the hues vibrant while still letting the kraft texture show in unprinted spots.

Where can you get white ink printing?
White ink is available through Avery, our professional custom printing service. Options include:
- Sheets: Clear film, chrome film, kraft brown, silver metallic film
- Rolls: Clear film, chrome film, all metallic finishes
How to add white ink to your labels
White ink can only be applied during professional printing, so plan for it early in your design. We make it easy to add white ink whether you’re using Avery Design & Print or Adobe Illustrator.
Using Avery Design & Print
Adding white ink in Avery Design & Print is simple. Here’s what you’ll see in the tool and what each option does:
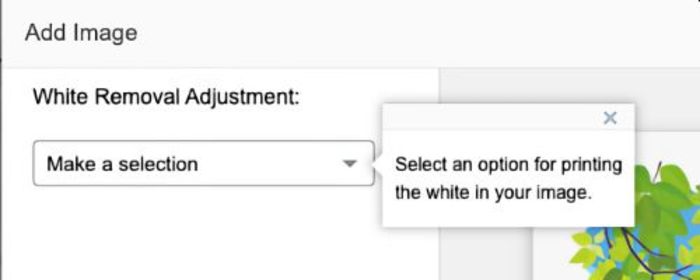
1. Select how you want to add white ink
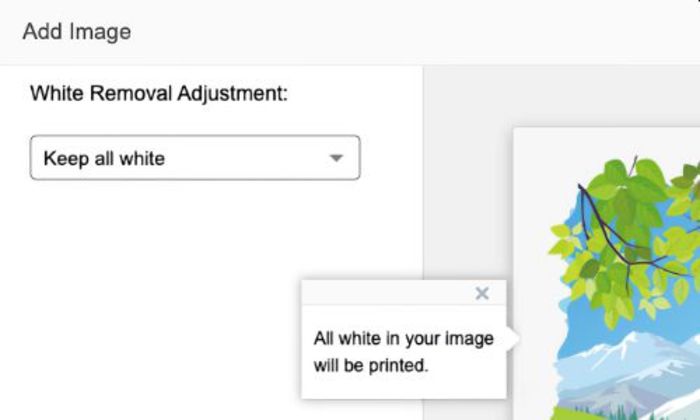
2. Keep all white
Prints white wherever it appears in your design
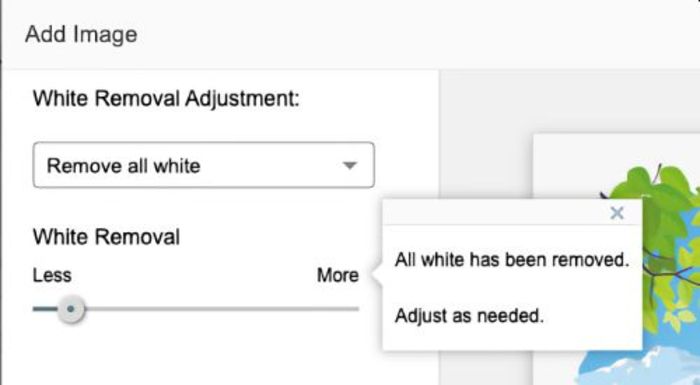
3. Remove all white
Lets the label material show through all white areas
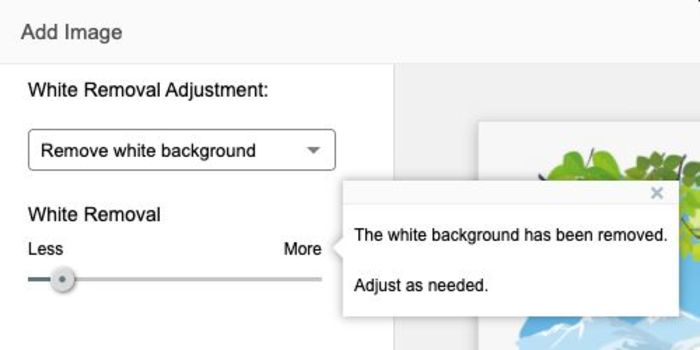
4. Remove White Background
Removes white from the edges of your design so the material shows through
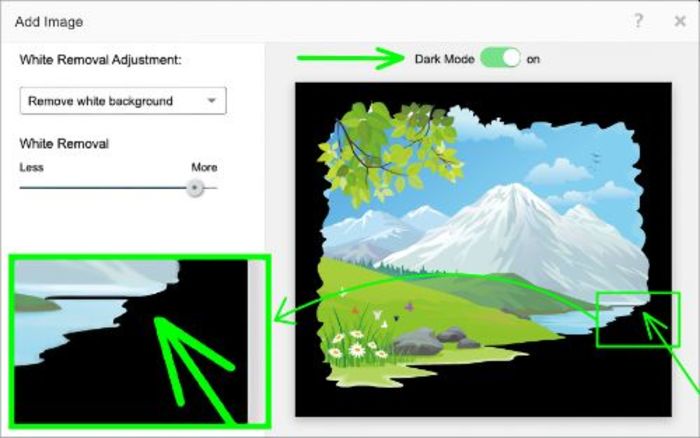
5. Dark mode
Preview which areas still contain white ink
Tip: For images, make sure the Use White Ink checkbox is selected (usually it is by default). Adjust the White Removal slider if you want to increase or decrease how much near-white color is removed.
Using Adobe Illustrator (for roll labels)
This step-by-step guide shows you how to add white ink in Illustrator to your roll labels. To do this, you need to have your roll label artwork created in Illustrator and all elements be in vector format.
Watch our quick video that shows you the steps below so you can follow along.
1. Open your document

2. Choose the elements that need white ink
For example, you might want white under logos, text, or certain graphics.
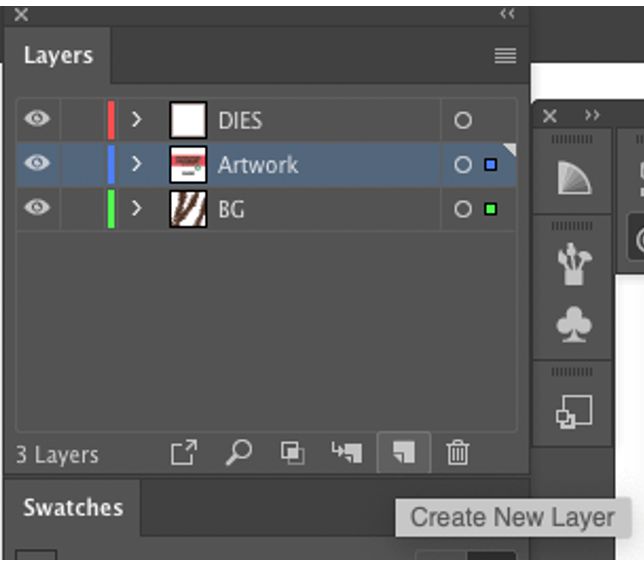
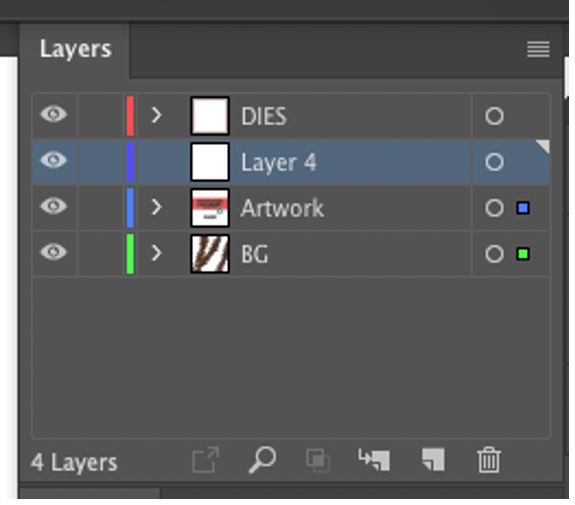
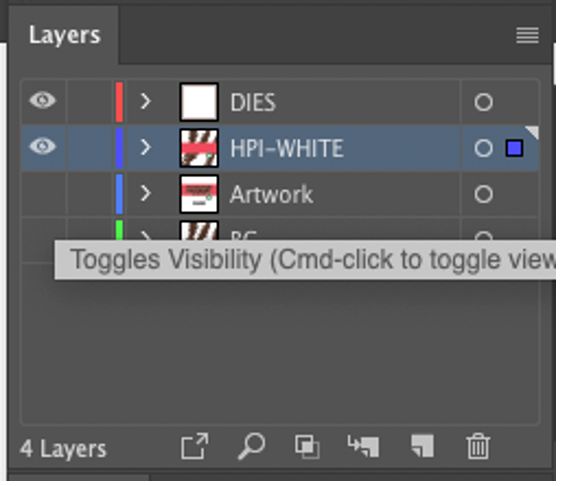
3. Copy elements to a new layer named “HPI-White”

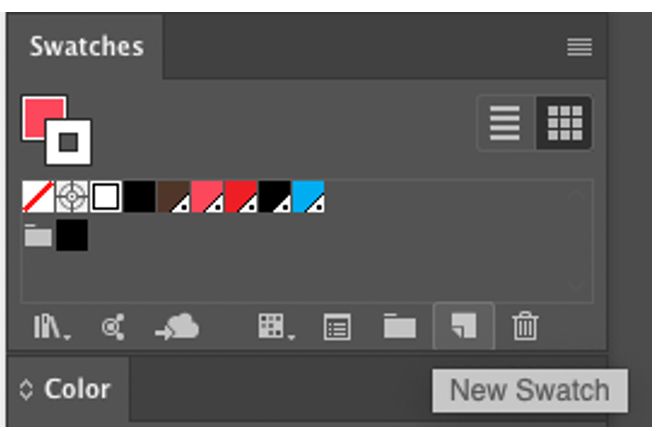
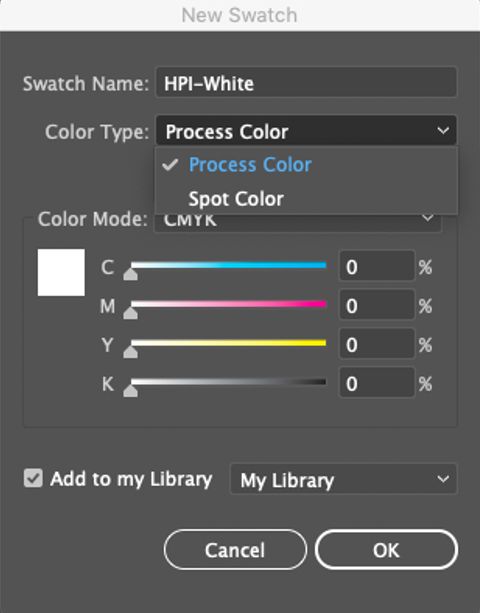
4. Create a new spot color swatch called “HPI-White”
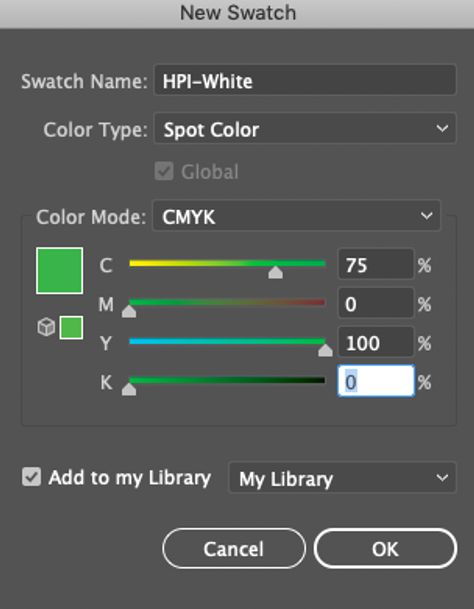
- Set the color type to Spot Color
- Apply this swatch to all elements on the HPI-White layer
Pro tip: Don’t choose white as the swatch color because it makes the design hard to see. Use a bright contrasting color like magenta for visibility.

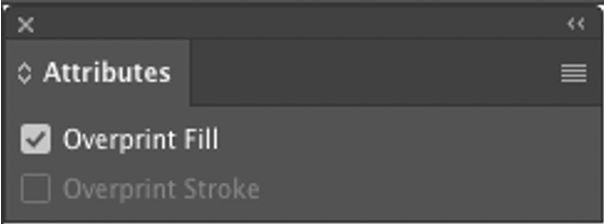
5. Set the white elements to “Overprint”
Open the Attributes panel and turn on Overprint for the white layer. Toggle the white separation on and off to confirm placement.


Once you’ve completed these steps, your file is ready for professional white ink printing.
Things to remember
- White ink is available on select Avery products only.
- Most desktop printers can’t print white ink, so white areas will just show the material color.
- Plan for white ink early in your design process for the best results.
Need help? Our Customer Care team is ready to answer questions at (800) 462-8379
FAQs about white ink printing
No. Most desktop printers don’t have white ink, so any white areas in your design will just show the color of the label material. For true white printing, use a professional service like Avery custom printing.
White ink is most helpful on clear labels, metallic labels, and kraft brown labels. It creates a base layer so your colors look bold and text stays easy to read.
Yes. Wherever white ink is applied on a metallic label, the shiny effect is blocked. To keep some metallic elements, leave areas without white ink.
Use white ink under your design to prevent the kraft color from muting your colors. This keeps your artwork vibrant while still showing the kraft texture in unprinted spots.

